Throughout this clinical case we will present a patient with direct veneers for restoration on teeth badly damaged by bruxism
Author: Dr. Pedro Alexandre
40-year-old male patient.
Chief complaint: The patient came to the clinic with great wear on both arches, because of severe bruxism, due to the orthodontic treatment, carried out to correct dental positioning and allow adequate space for the restorations.
Initial Evaluation
After orthodontic treatment, an alginate impression was taken with the aim of diagnostic waxing, as well as intra and extraoral photographs were taken, in order to plan the dental reconstructions, based on the characteristics and lines of the patient’s face. The waxing then followed the photographic evaluation and allowed the development of waxed models, which served as a base to construct the palatal surfaces of the teeth, both in the superior and inferior arches.
This step is extremely important, as the freehand reconstruction of these faces prevents the adequate recomposition of the structures of the marginal ridges, therefore, preventing a correct palatal anatomy, which does not provide correct disocclusion guides, that are very important for the longevity of a work of these proportions.
Treatment Performed in Direct Veneers
From the planning, the procedures to produce veneers and dental reconstructions were followed. A long clinical session was scheduled so that the superior vaneers of the second premolar could be performed, up to the second superior premolar. After adequate isolation, prophylaxis was performed with pumice and water, removing the remaining acquired pellicle. Acid etching was performed with Condac 37, observing the appropriate times, as it should not exceed 15 seconds on the enamel so as not to reduce the bond strength. And the Ambar APS adhesive system was applied due to its bond strength characteristic and also its APS system, which does not yellow the interface.
The composite of choice was the Composite Vittra APS shade of whitened teeth, DBL1 and EBL1, the shades DA2 and Trans OPL were also used. Then, the restorative sequence was the reconstruction of a thin palatal layer, through the silicone guide, which had been manufactured
from the waxed model.
The composite used was Vittra APS Trans OPL. It was observed that this layer needs to be extremely thin and, to add the next layer, the guide was kept in position. After this layer, it was necessary to use a composite that had the same shade as the dental substrate, in order to level the reconstructed palatal layer with the remainder, for this purpose Vittra APS DA2 composite was used. It was also observed that space was left between the dental lobes to create incisal translucency.
Afterwards, the phasing of the tooth began, for this purpose a layer of Vittra APS DBL1 was used, covering the entire buccal surface while the cervical third received a slightly greater thickness of this layer than the incisal third. This layer needs to be applied calmly and, due to the APS system, it takes a long time to work, even in high light conditions, and at this point, attention must be paid to the anatomy to avoid different thicknesses in the same region and already start the correct vestibular anatomy, which will be finalized in the next layer.
The final layer was done with Vittra APS EBL1 composite in a thin surface layer. Composite, today, has become an extremely versatile material, allowing extensive rehabilitations, included. This is due to its better mechanical properties, comparable even to feldspathic porcelains. In addition, the evolution of techniques and materials for finishing, polishing and photoactivation of these composites, a very long longevity of these treatments has been observed. It is undeniable that for any treatment to have longevity, correct diagnosis is necessary for the best indications.
Step by Step

1 | Buccal view planning wax-up.

2 | Lingual view planning wax-up

3 | Palatal guide for tooth reconstruction

4 | Isolation to start restorations.

5 | Guide test with isolation.

6 | Application of Condac 37.

7 | Application of Ambar APS with a brush
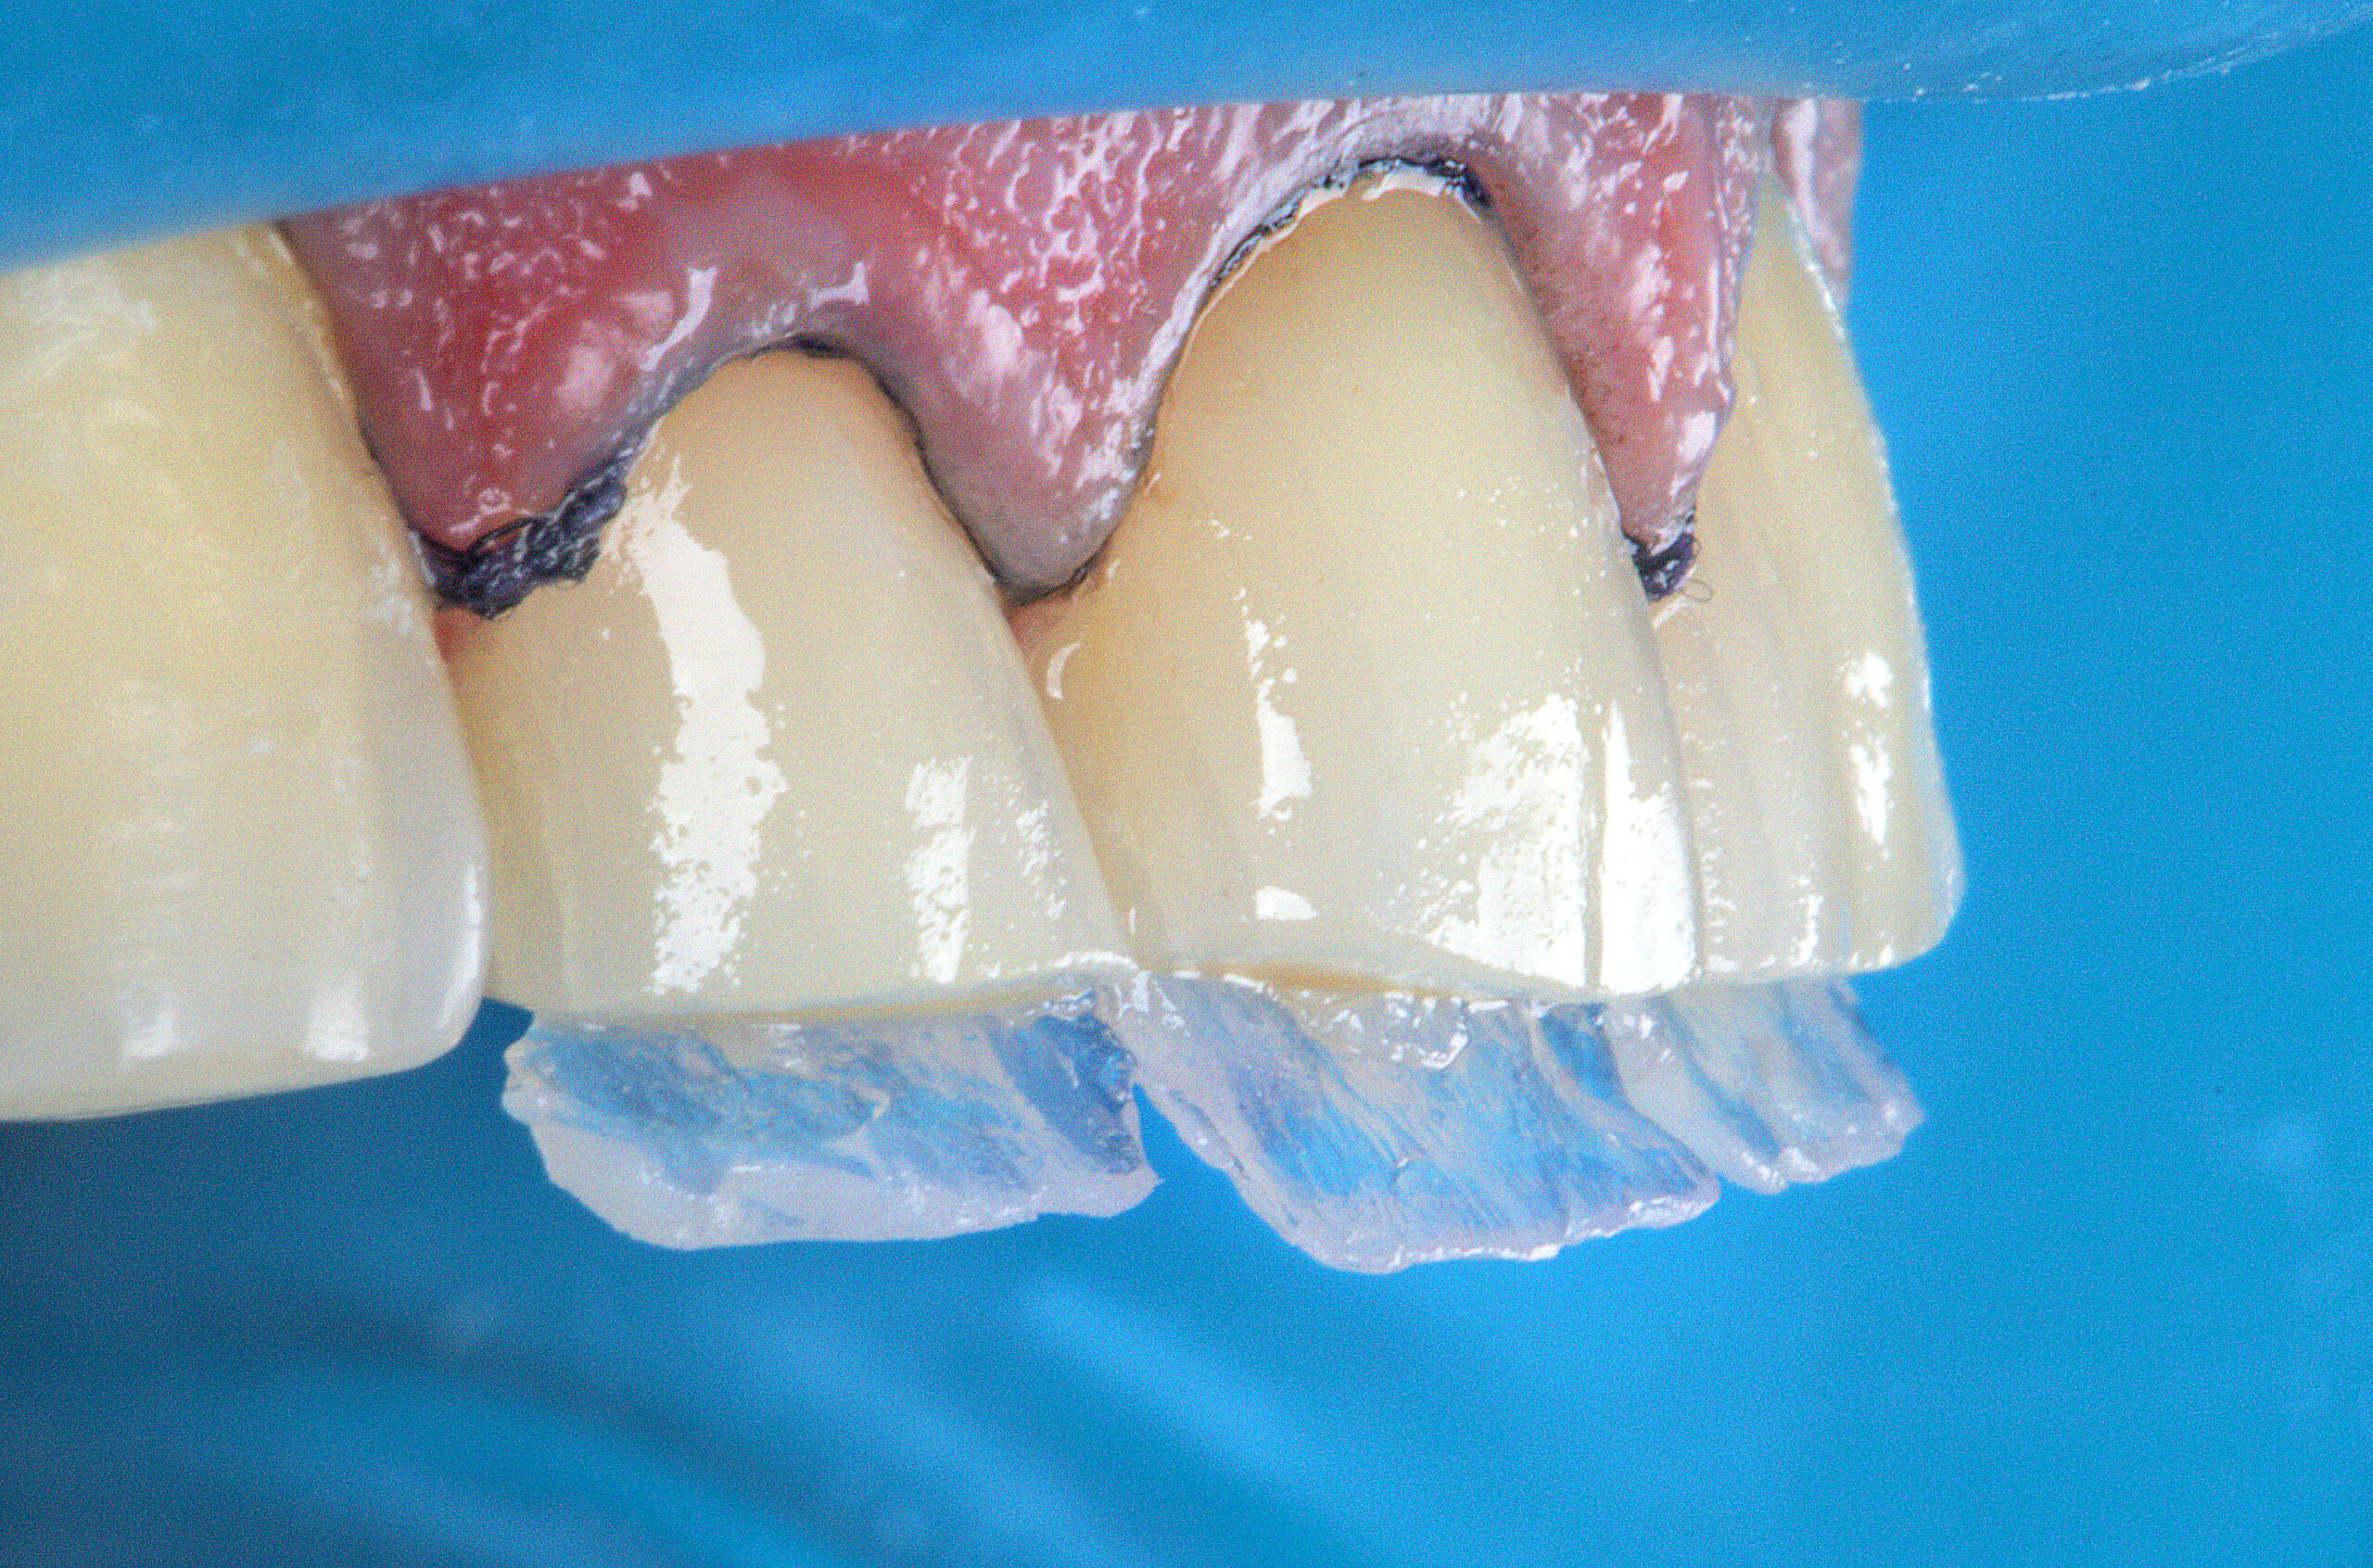
8 | Reconstruction of the palatal surface with Vittra APS Trans OPL composite.
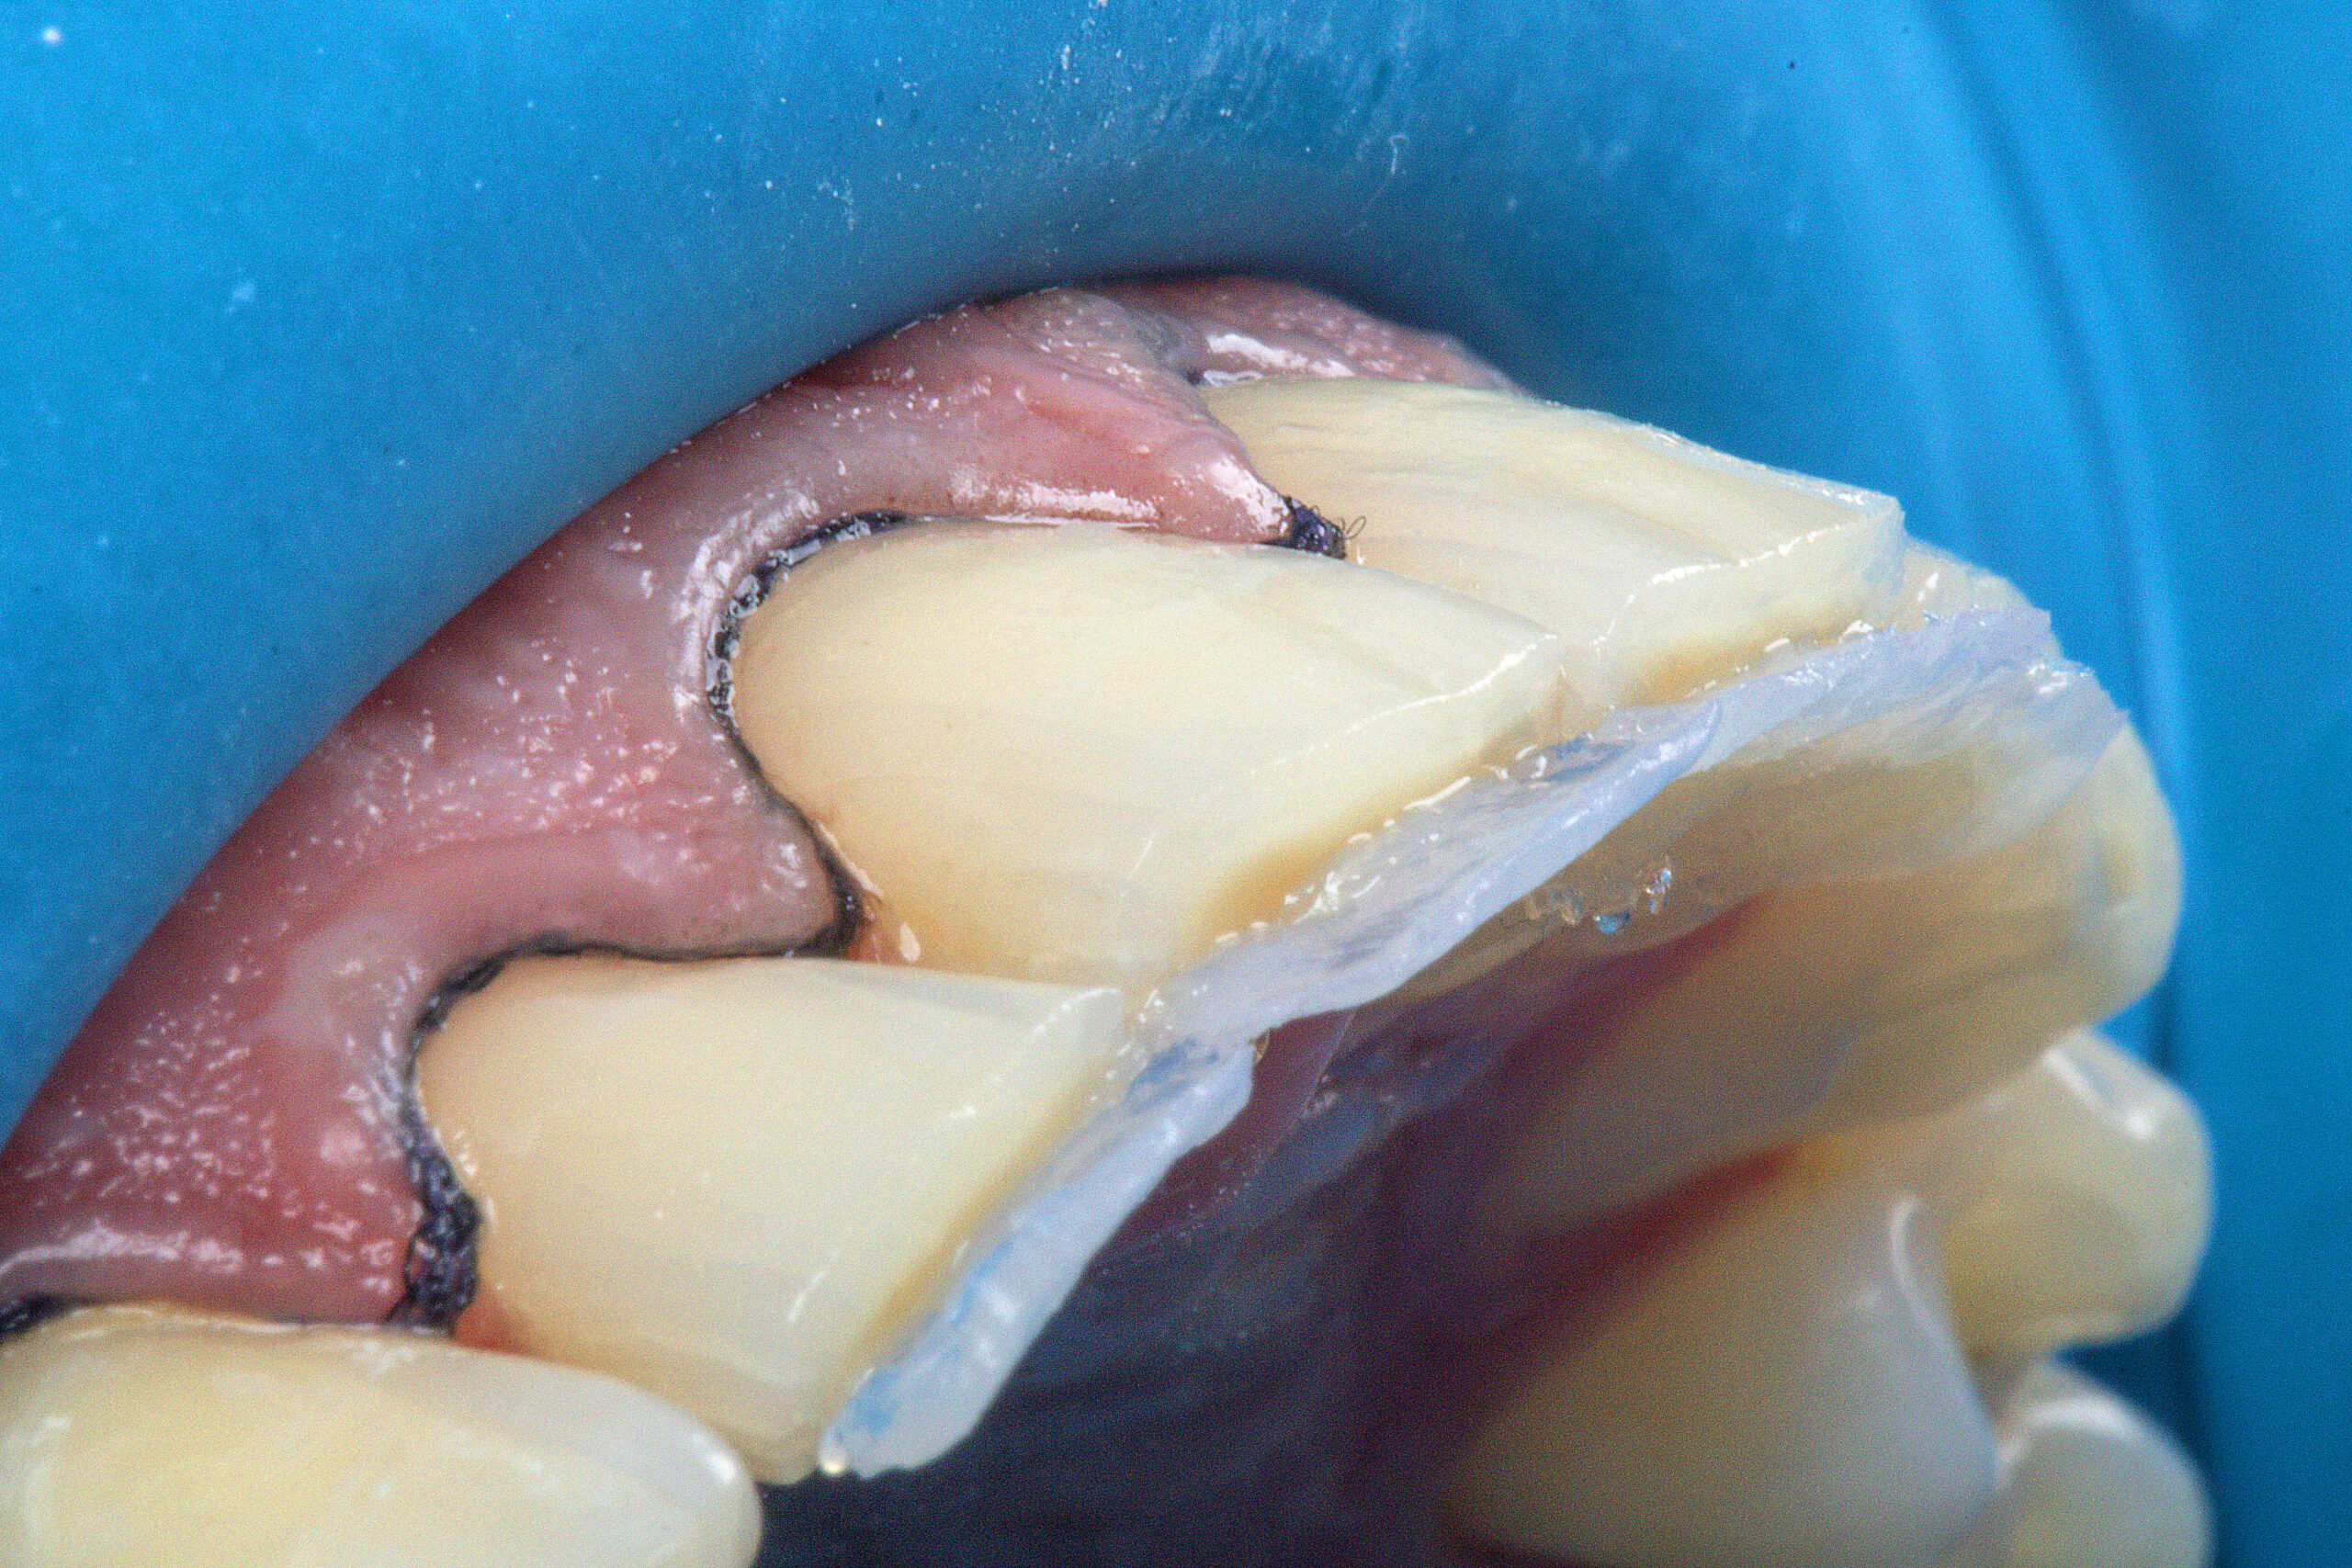
9 | Palatal surfaces reconstructed with Vittra APS Trans OPL.
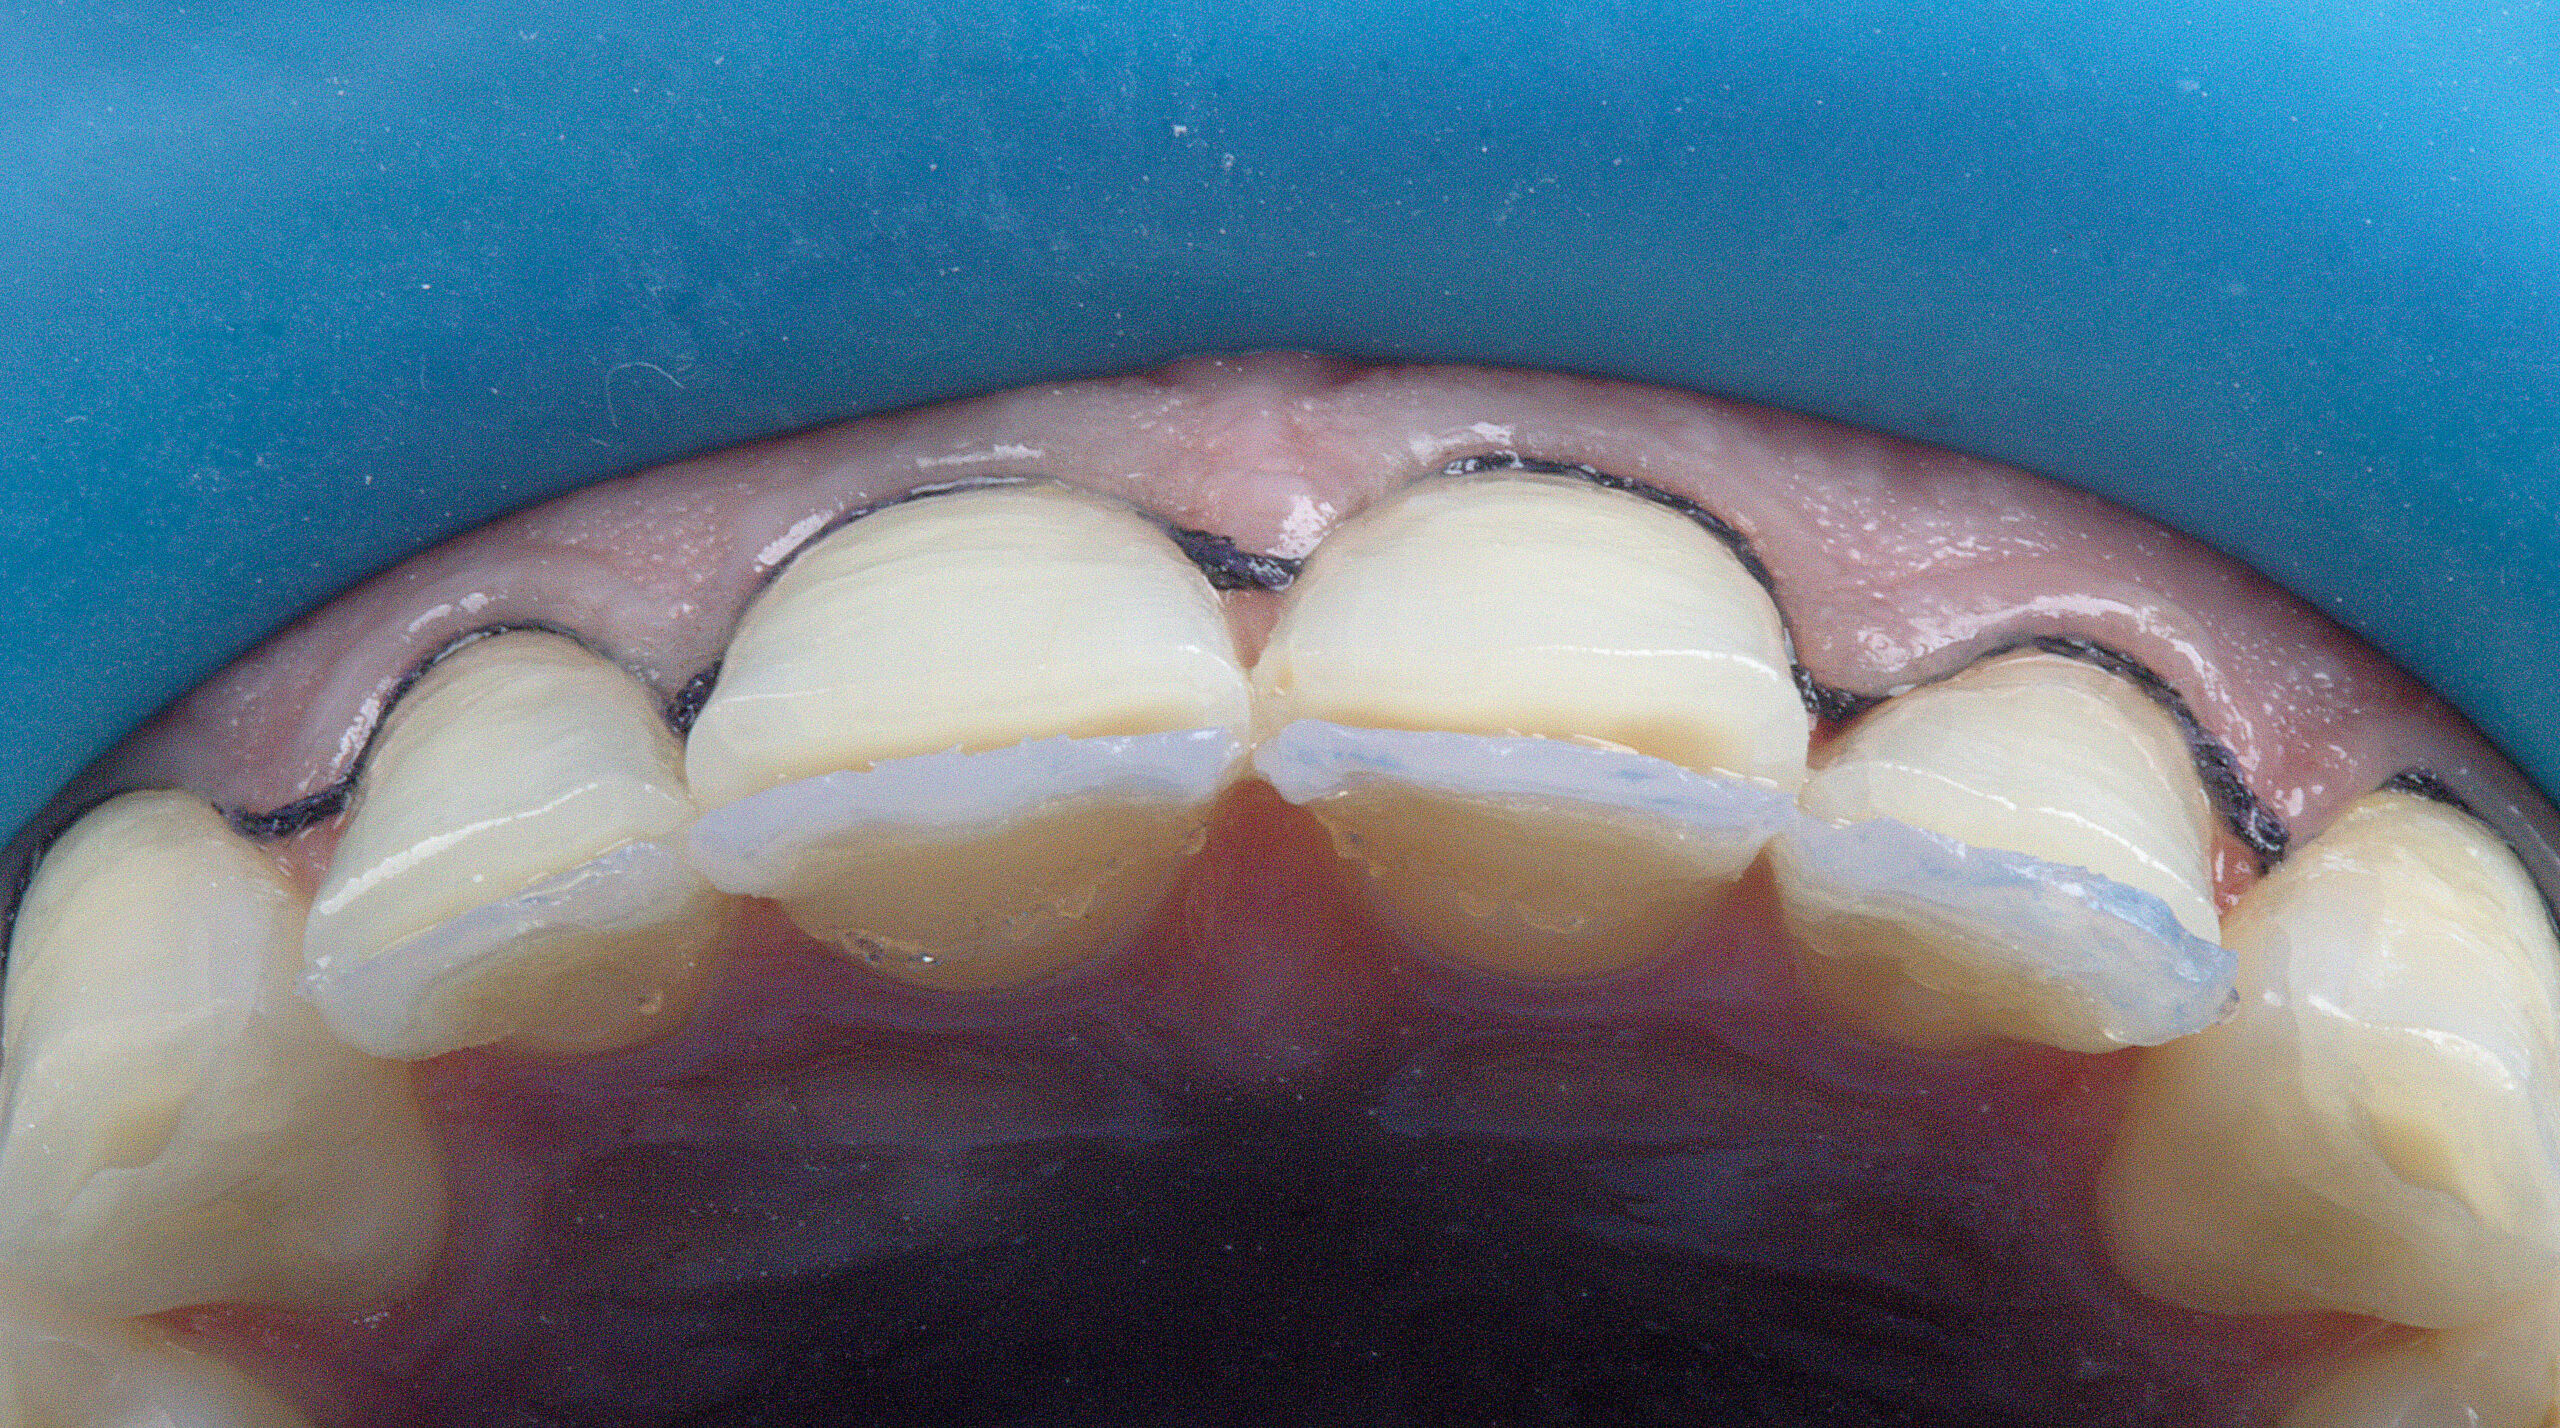
10 | Incisal view of the palatal surface demonstrating the thickness and remaining space.
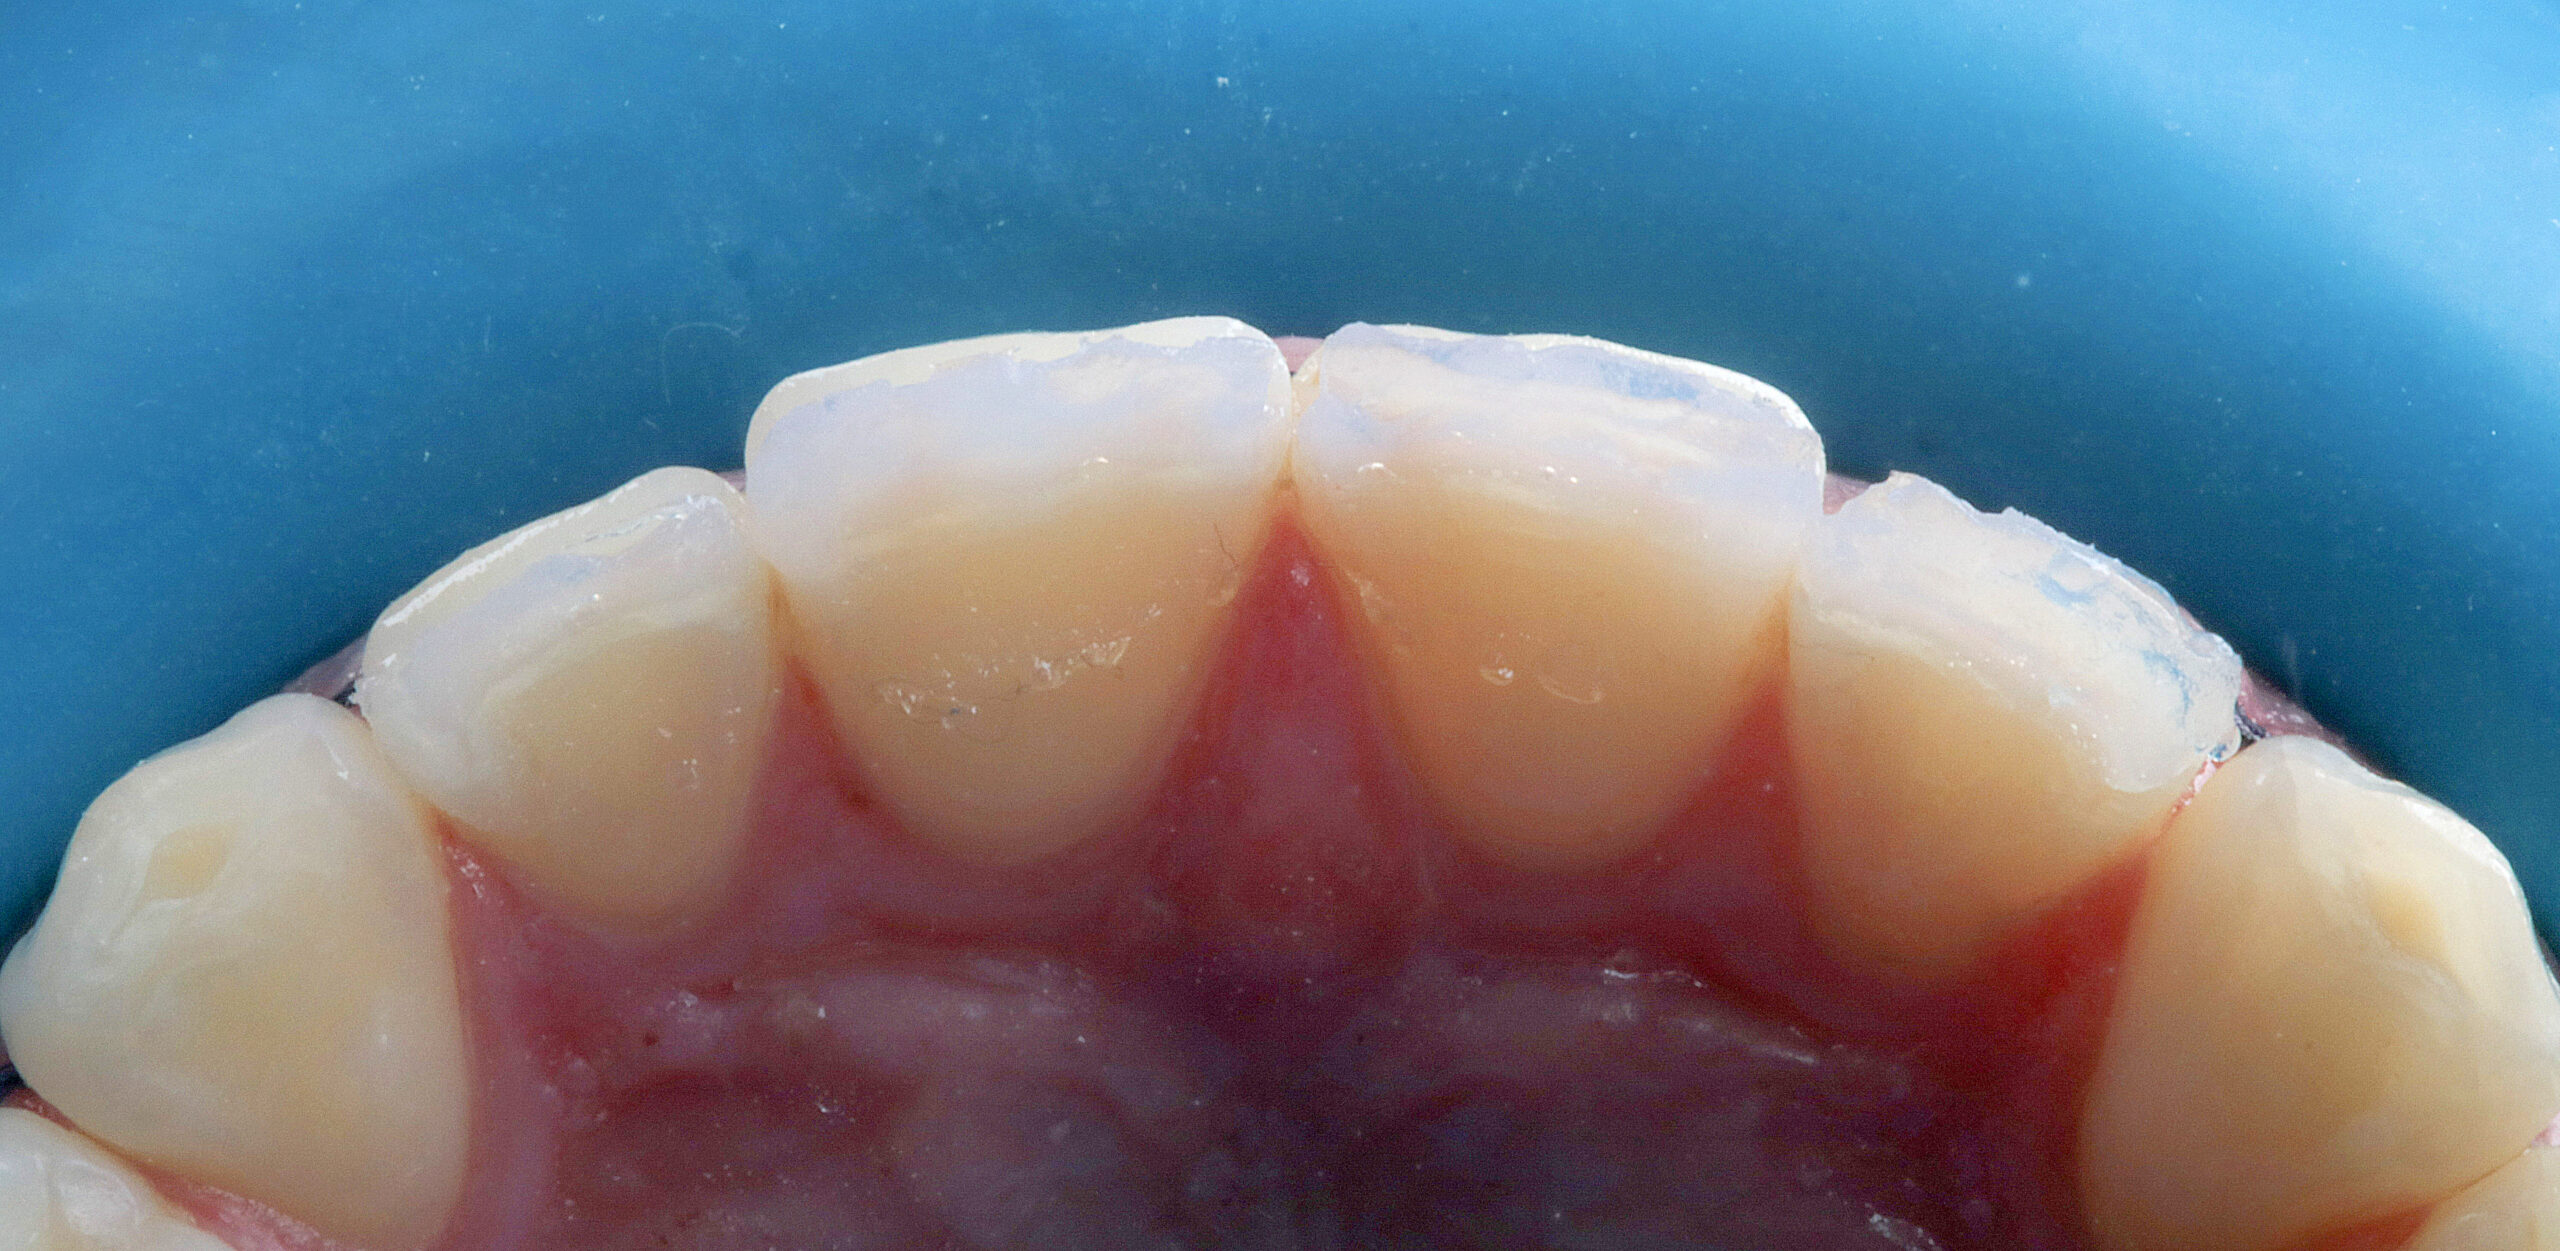
11 | Palatal view of the detail of the perfection of the reconstruction of the palatal structures.
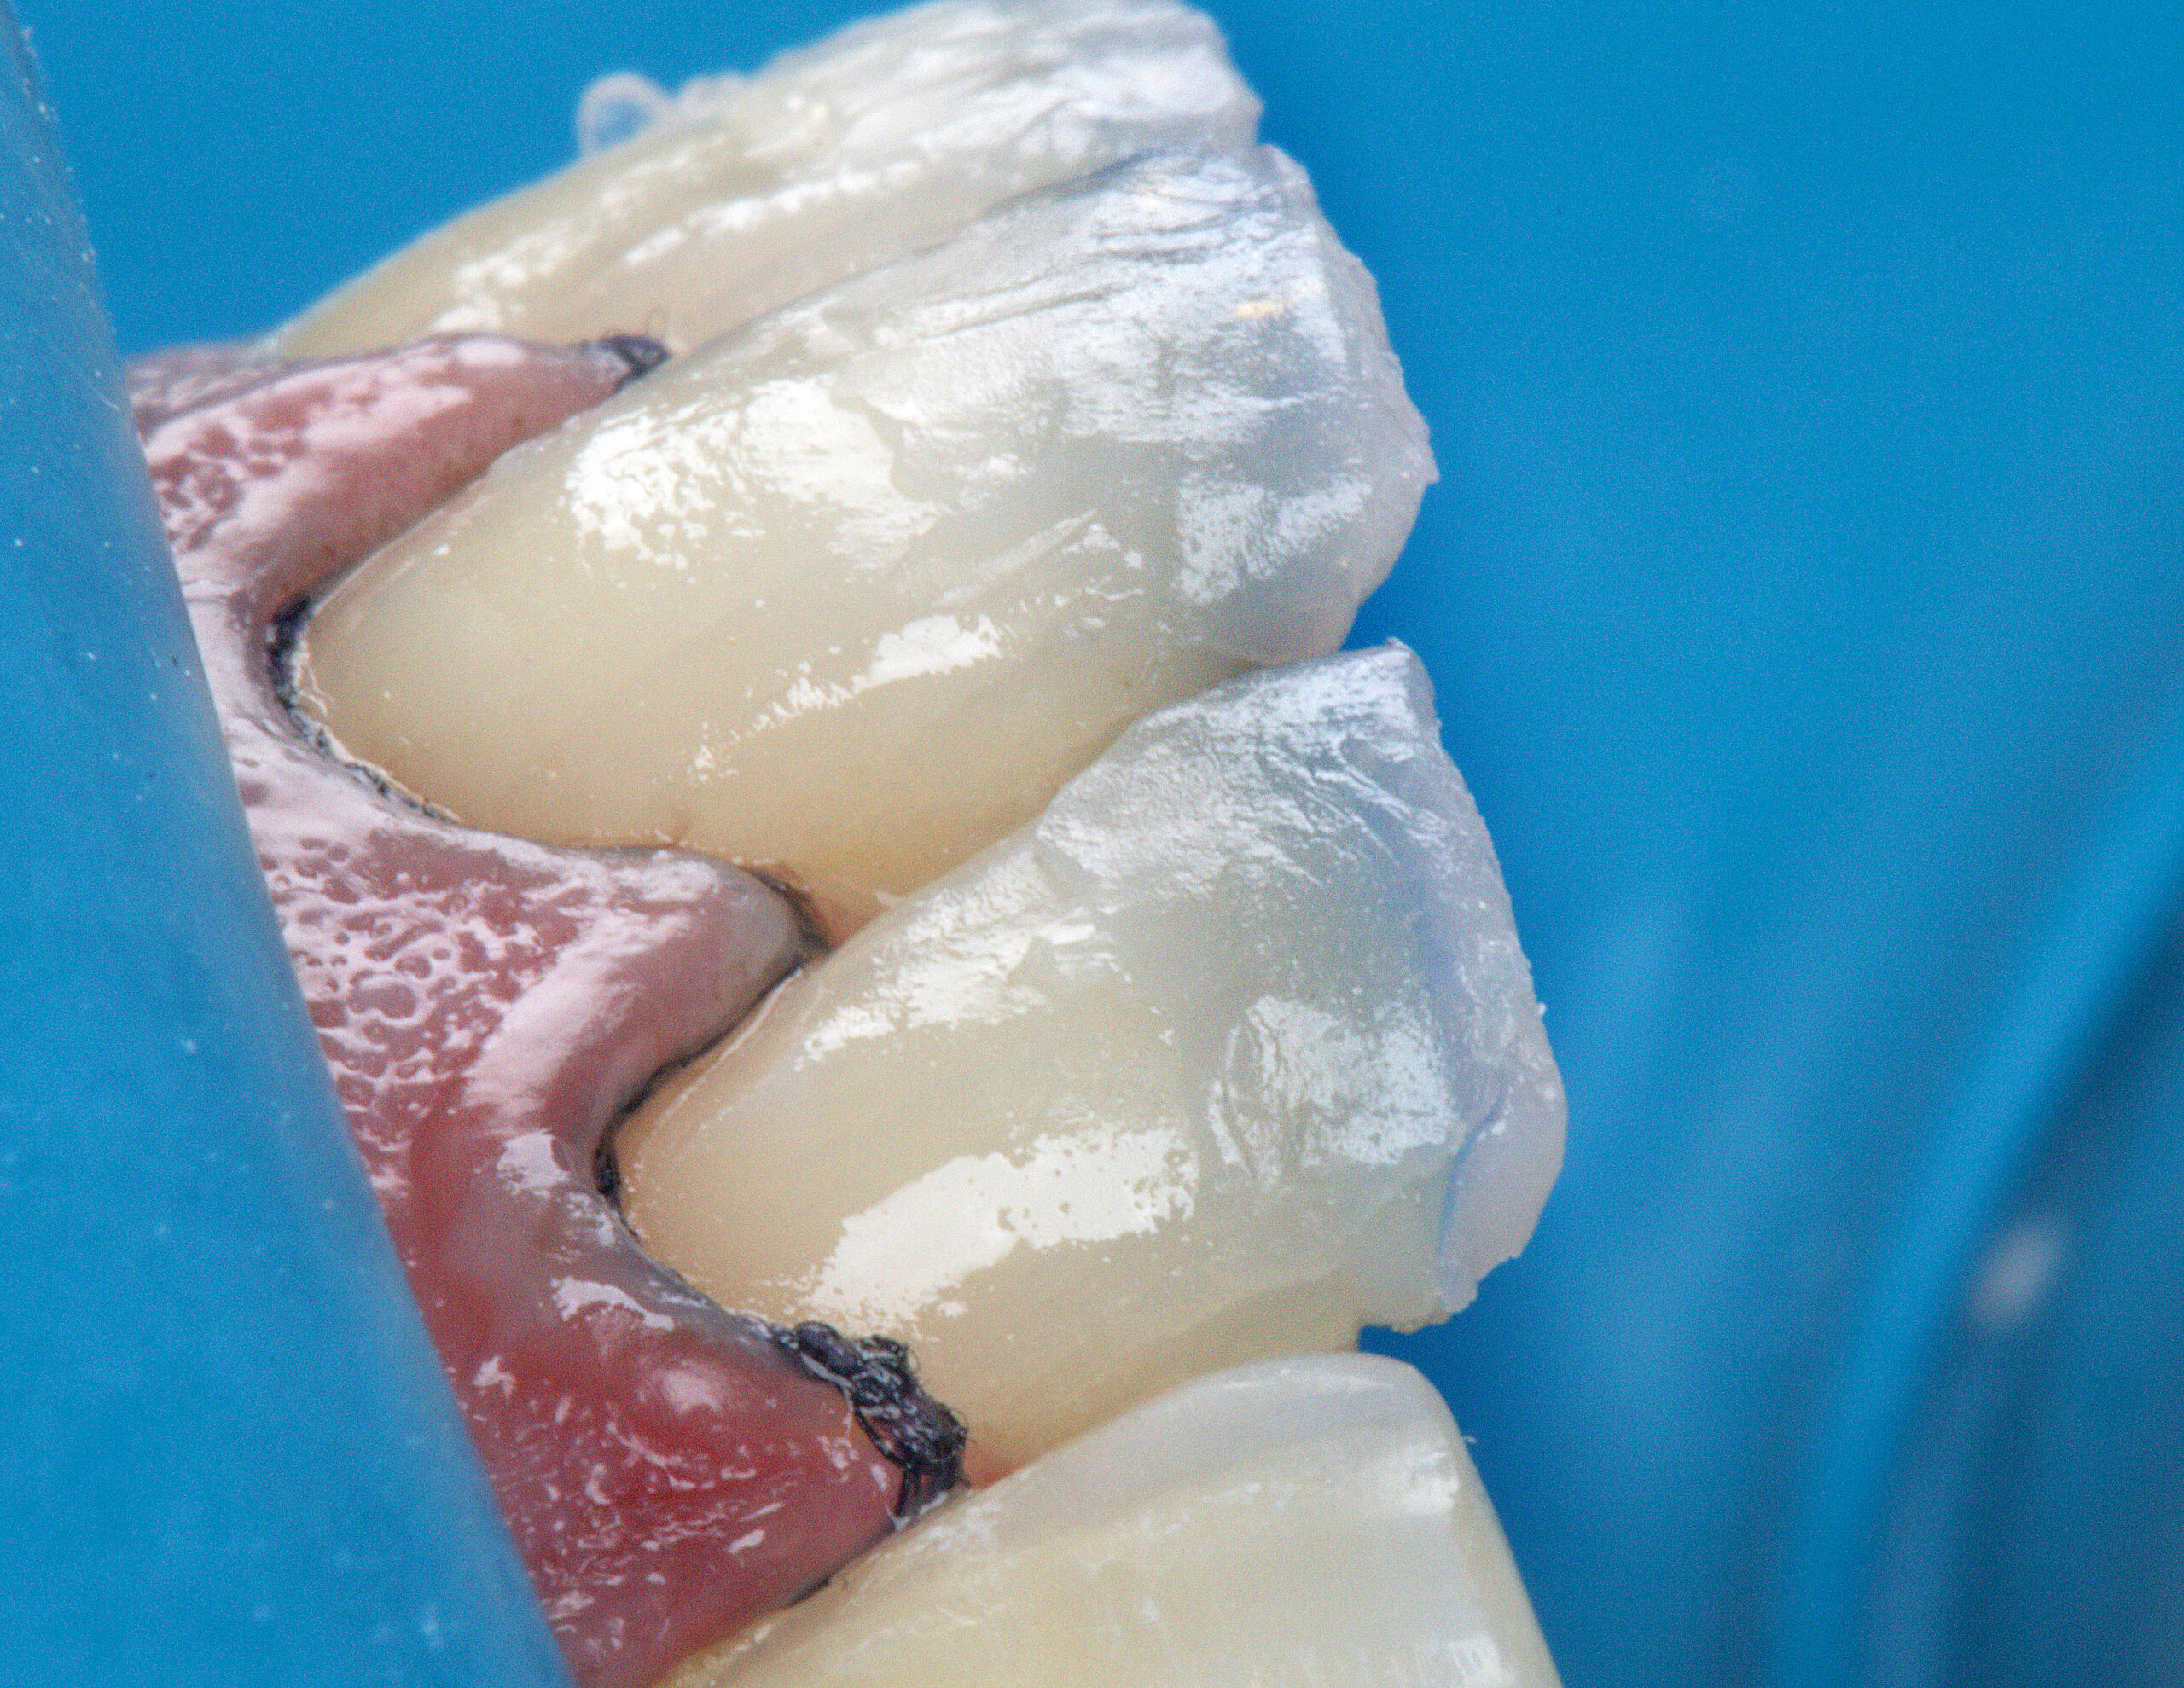
12 | Substrate equalization with Vittra APS DA2 composite and Trans OPL complements.
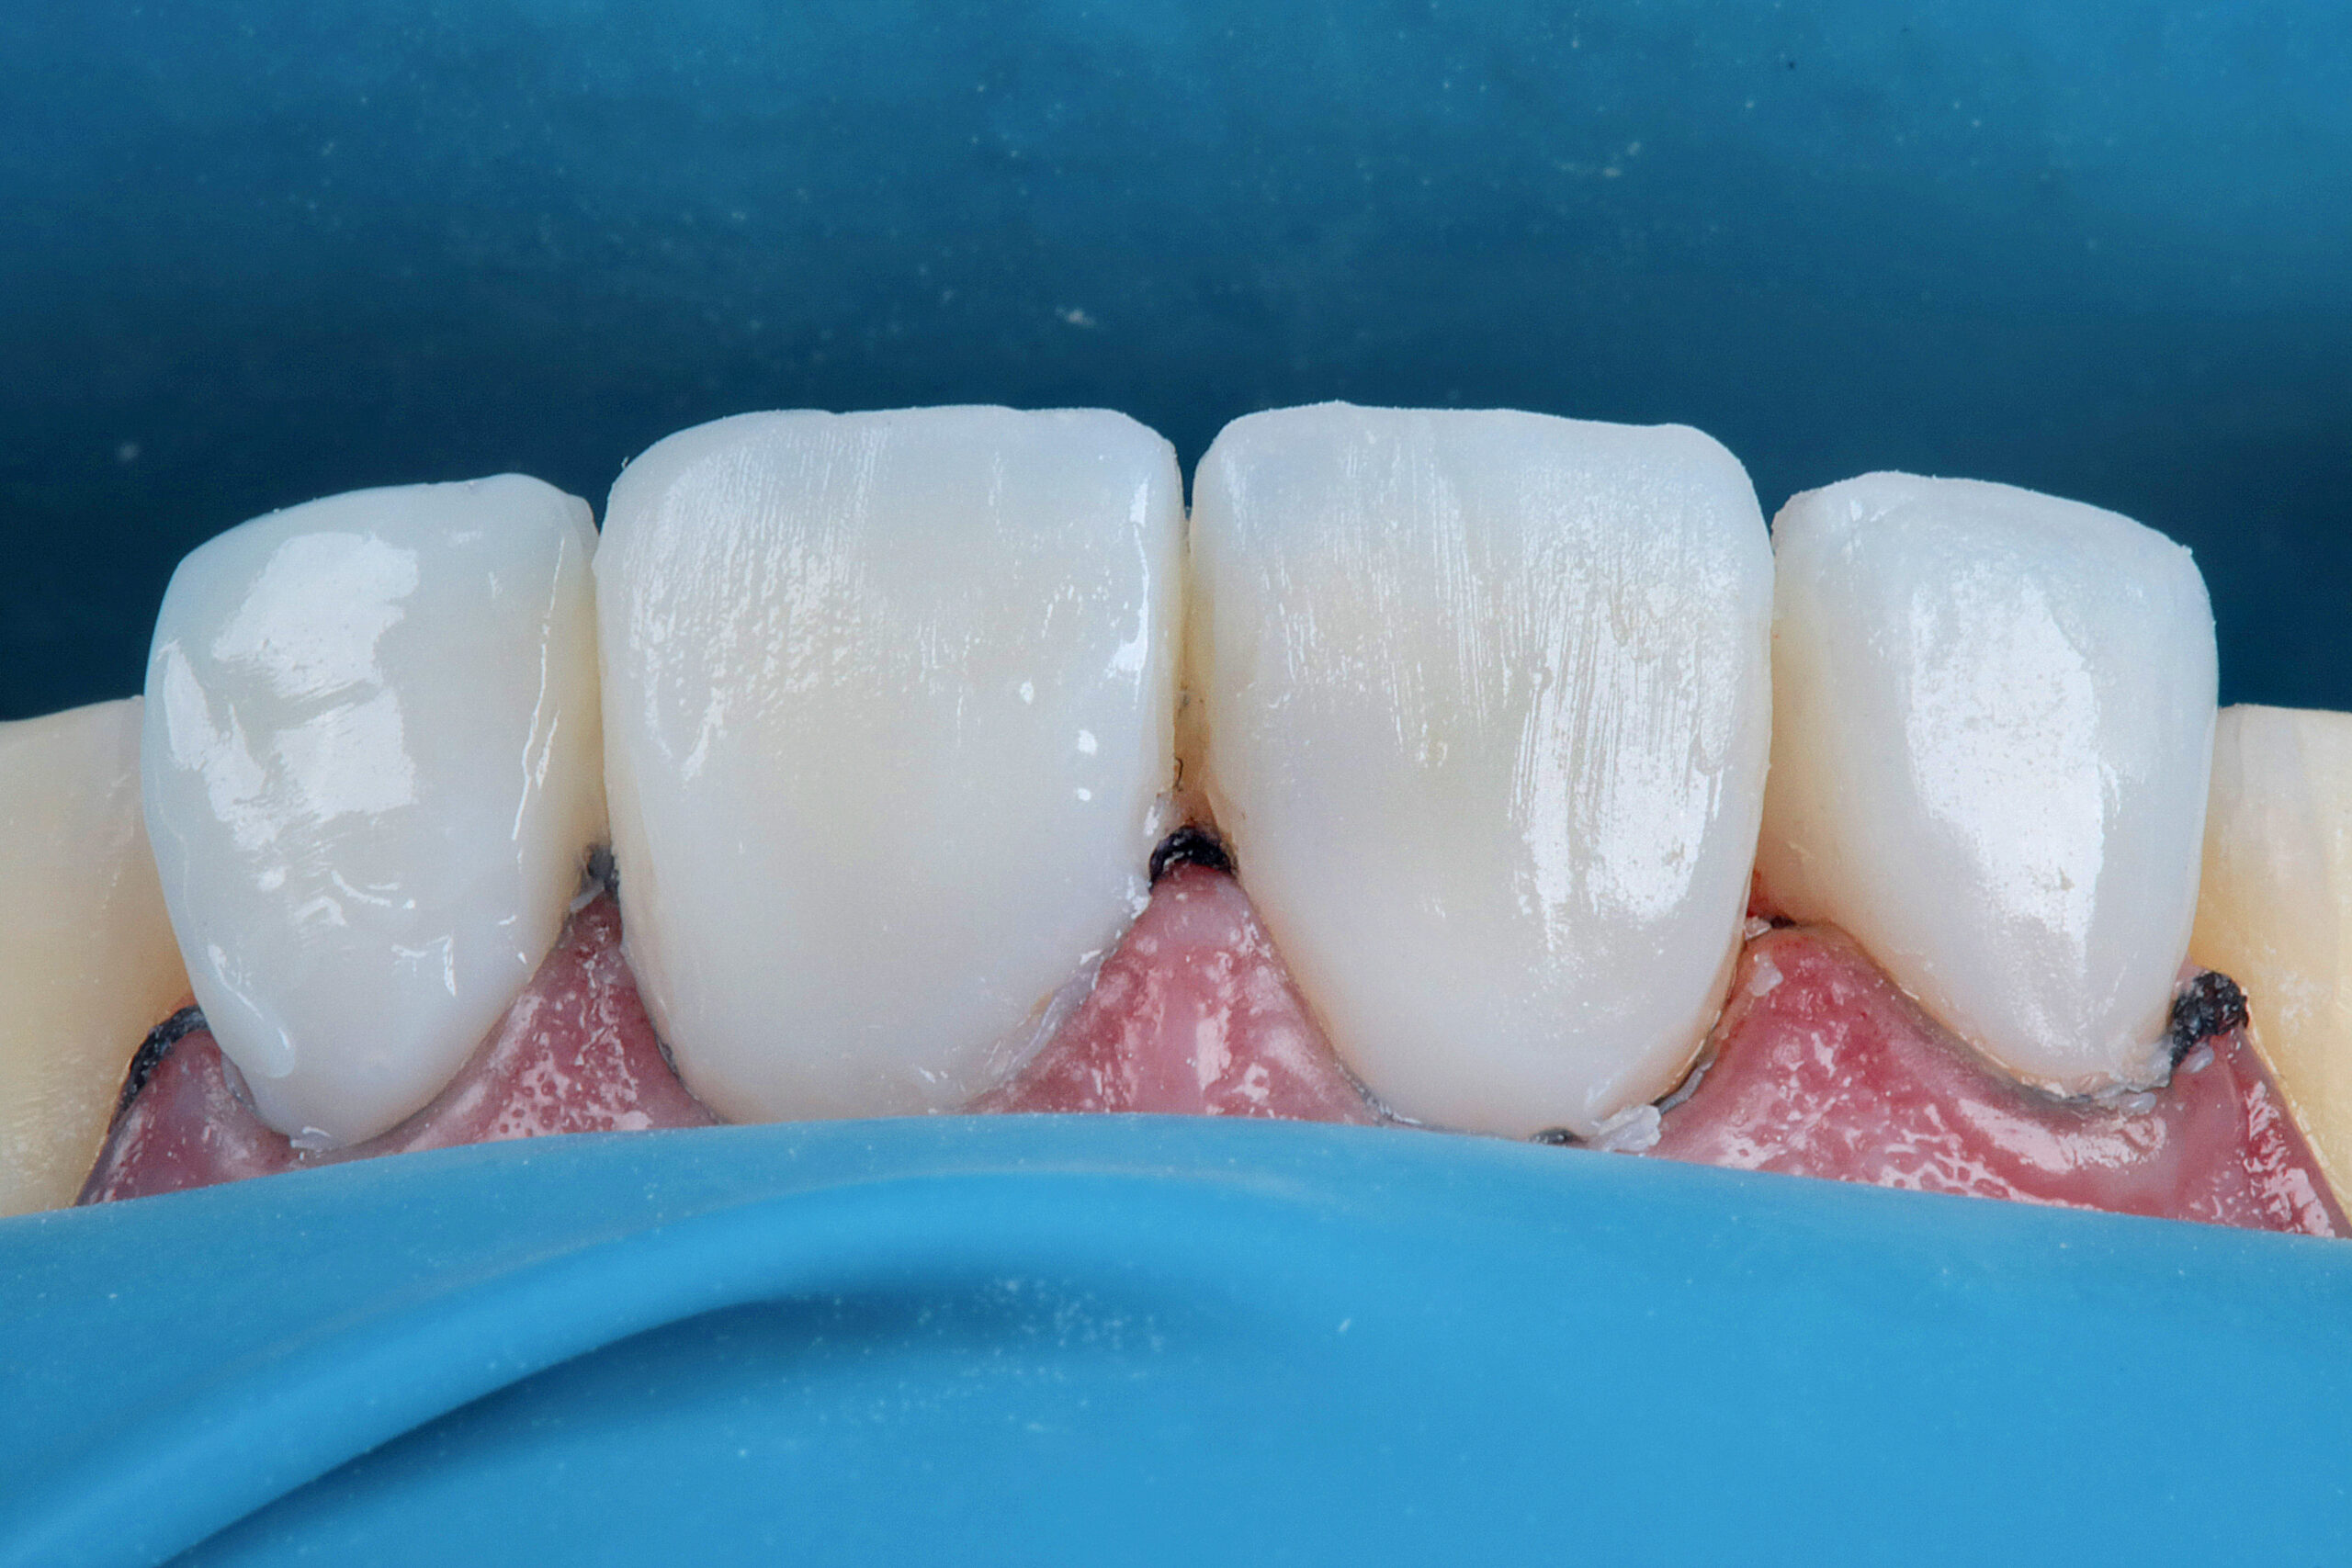
13 | Veneer with Vittra APS DBL2 composite.
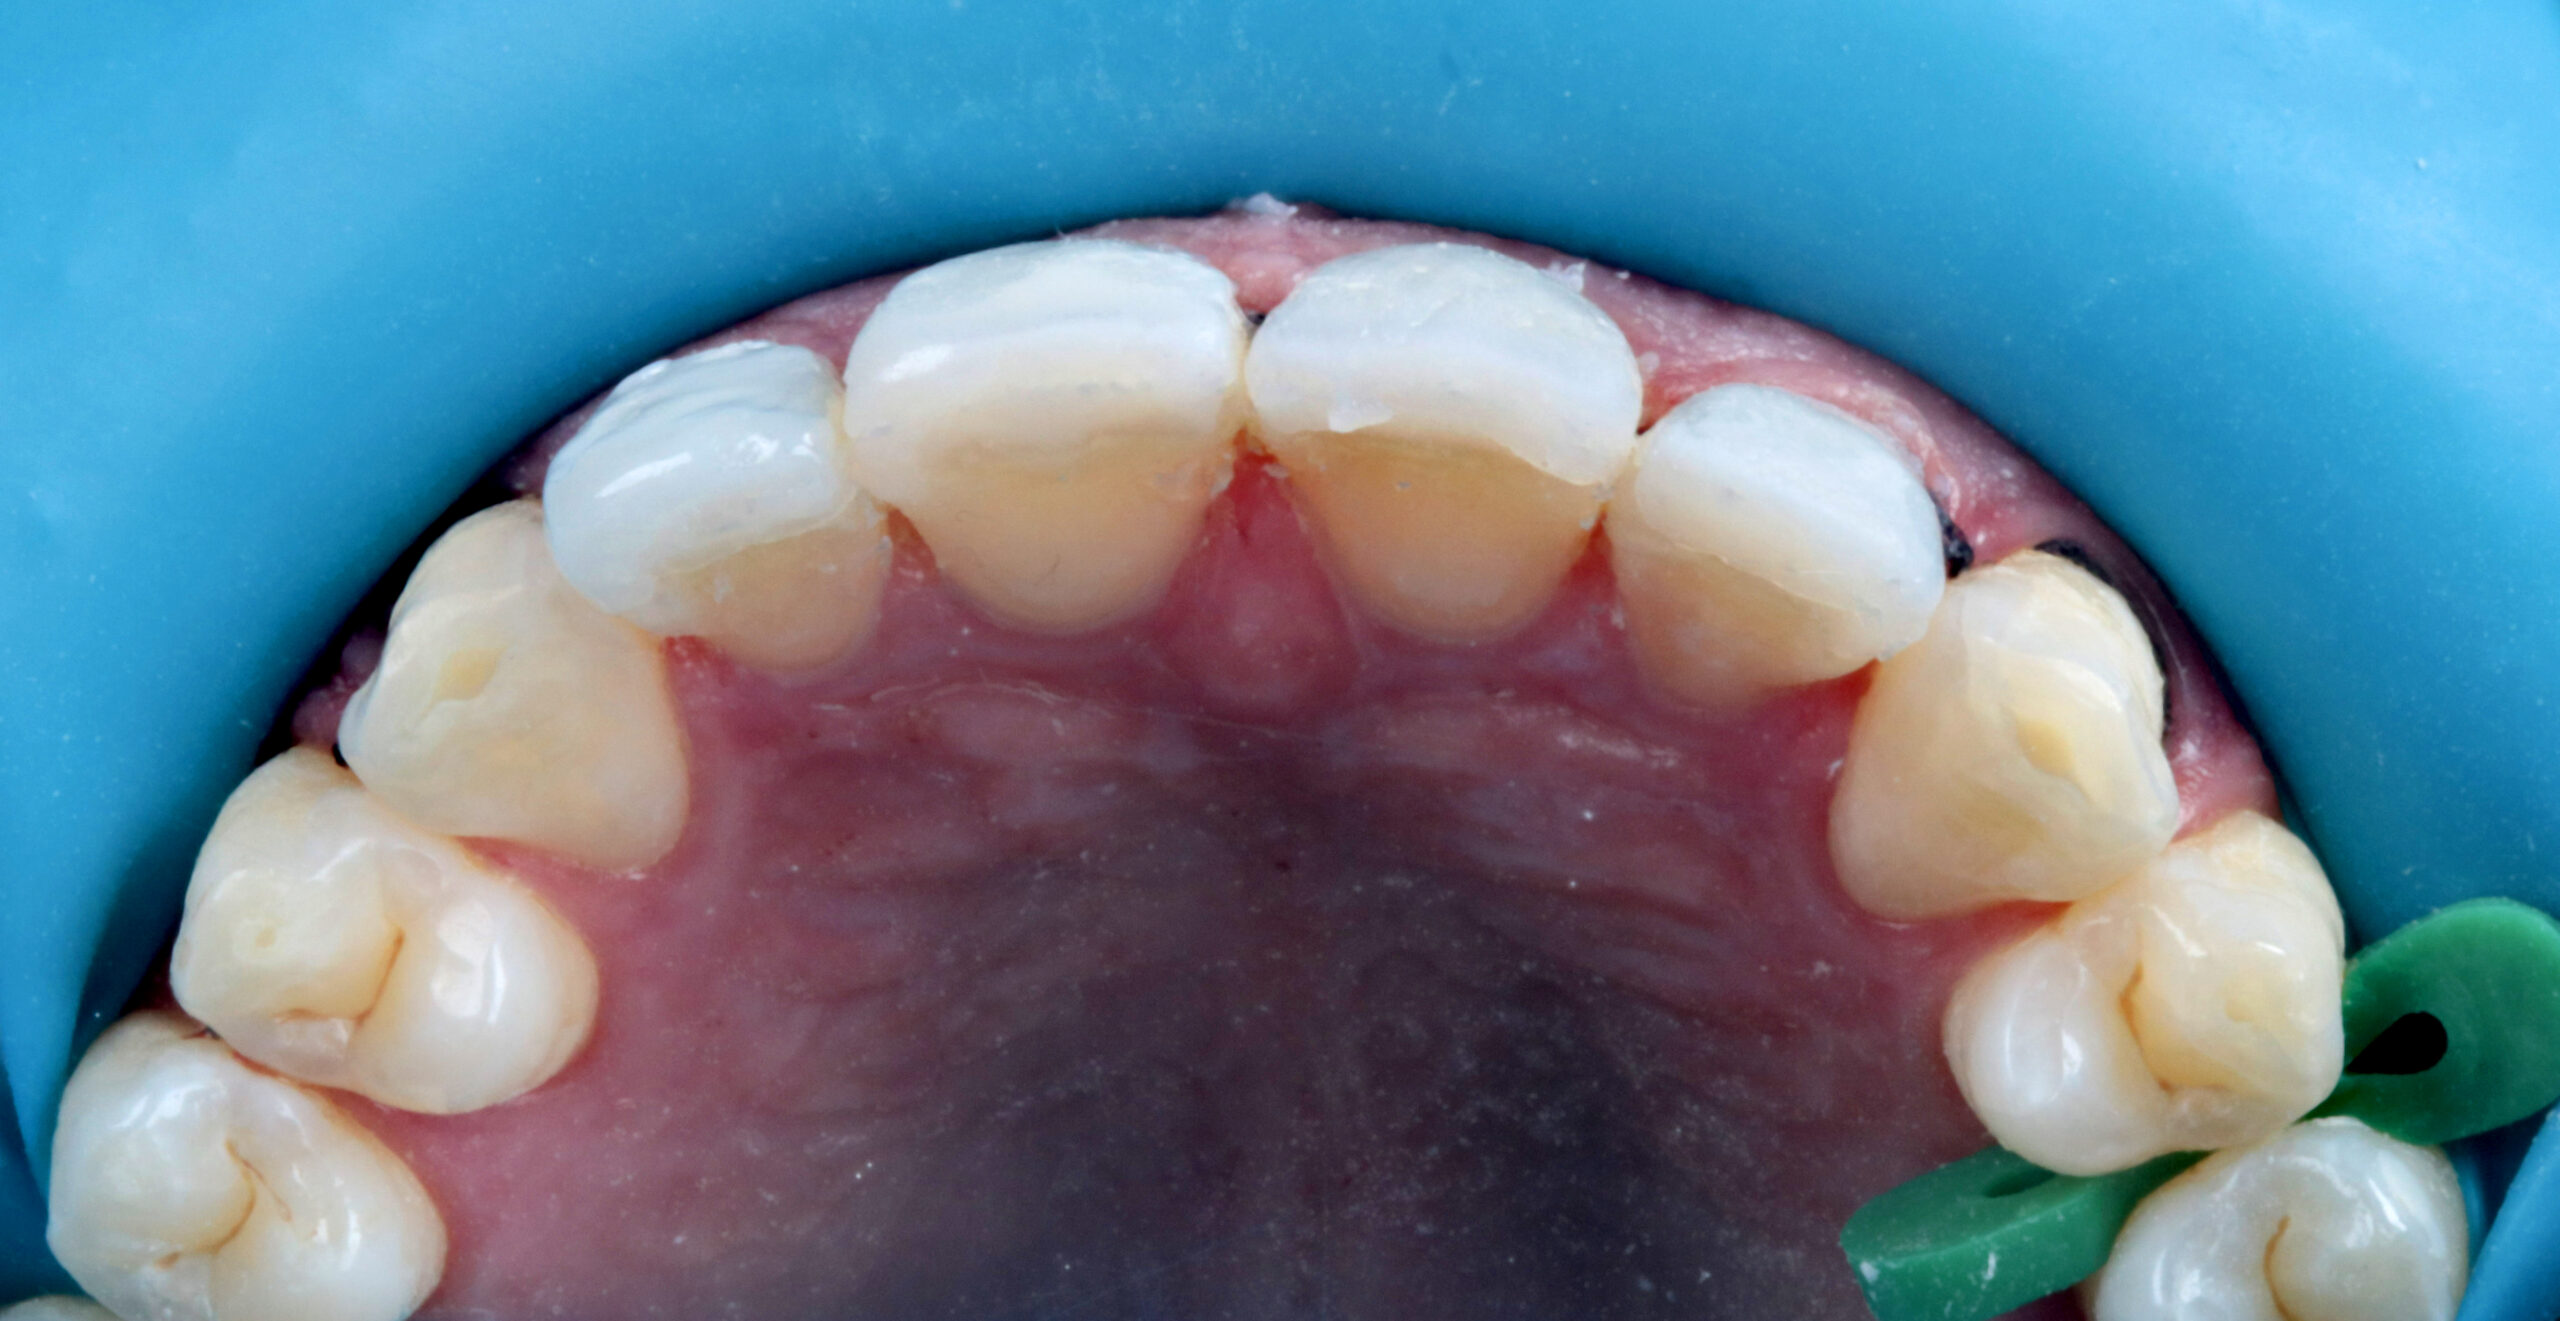
14 | Final layer of Vittra APS EBL2 composite.
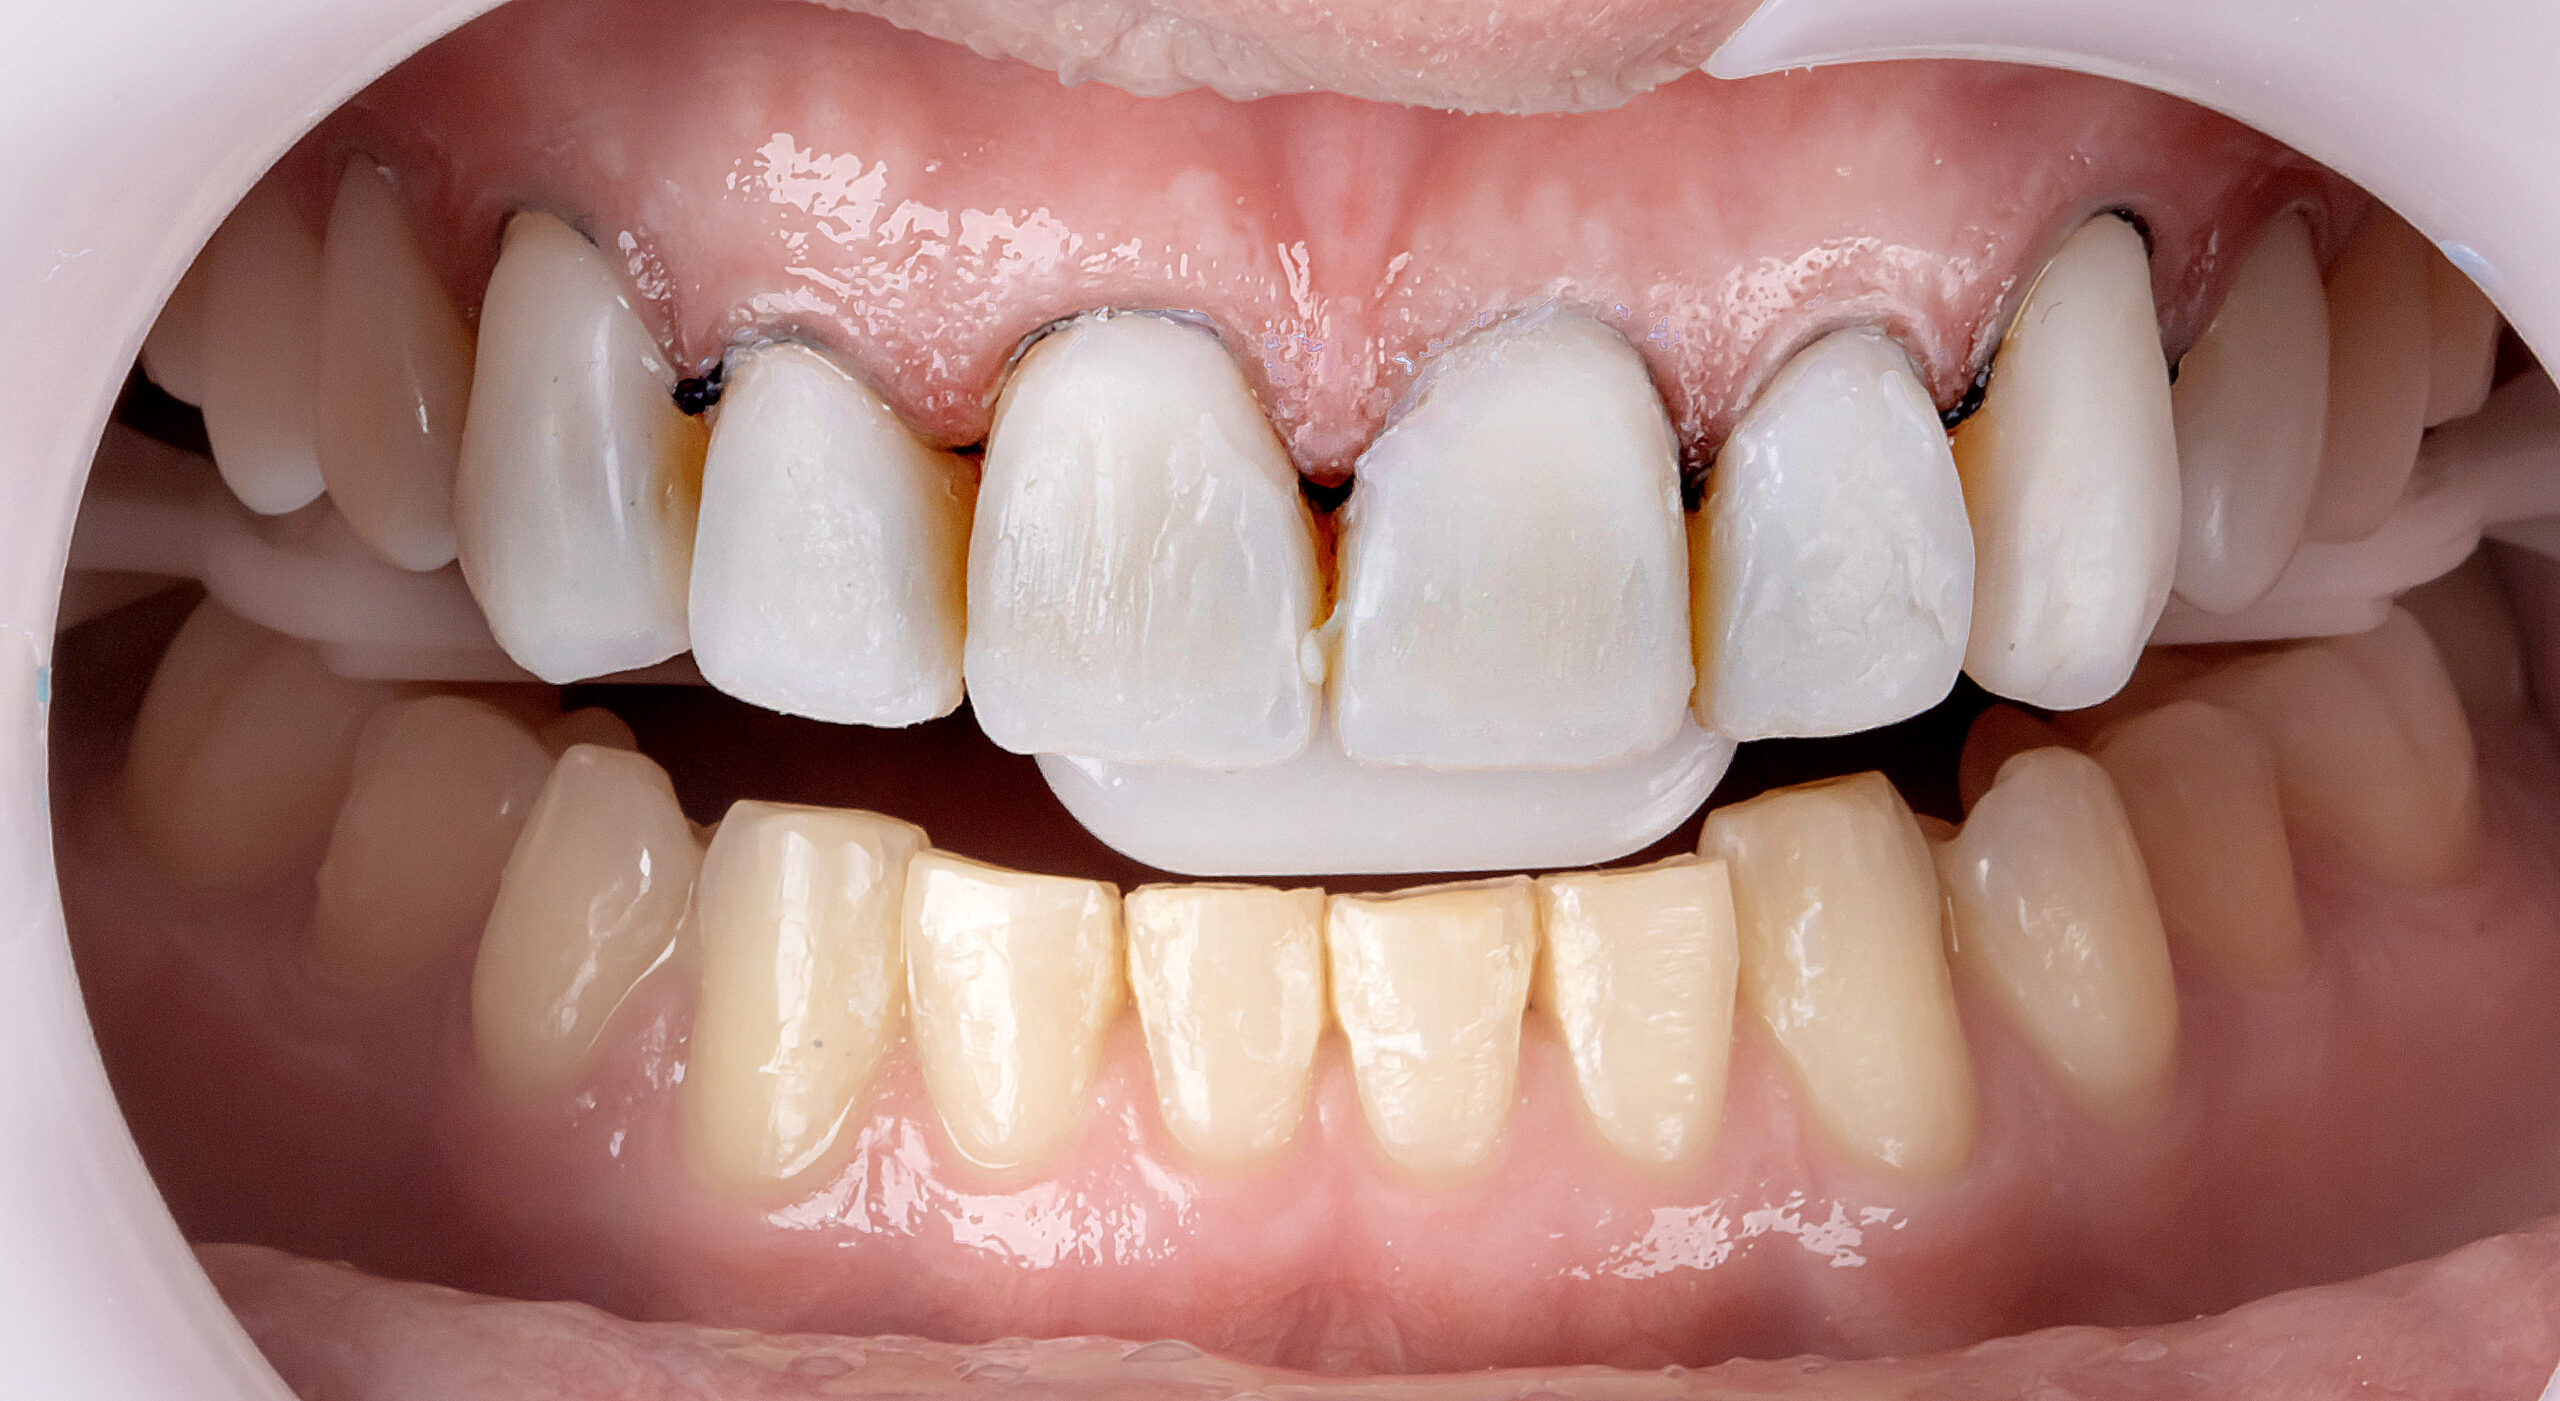
15 | Finalization of the other dental elements with the same shade sequence.
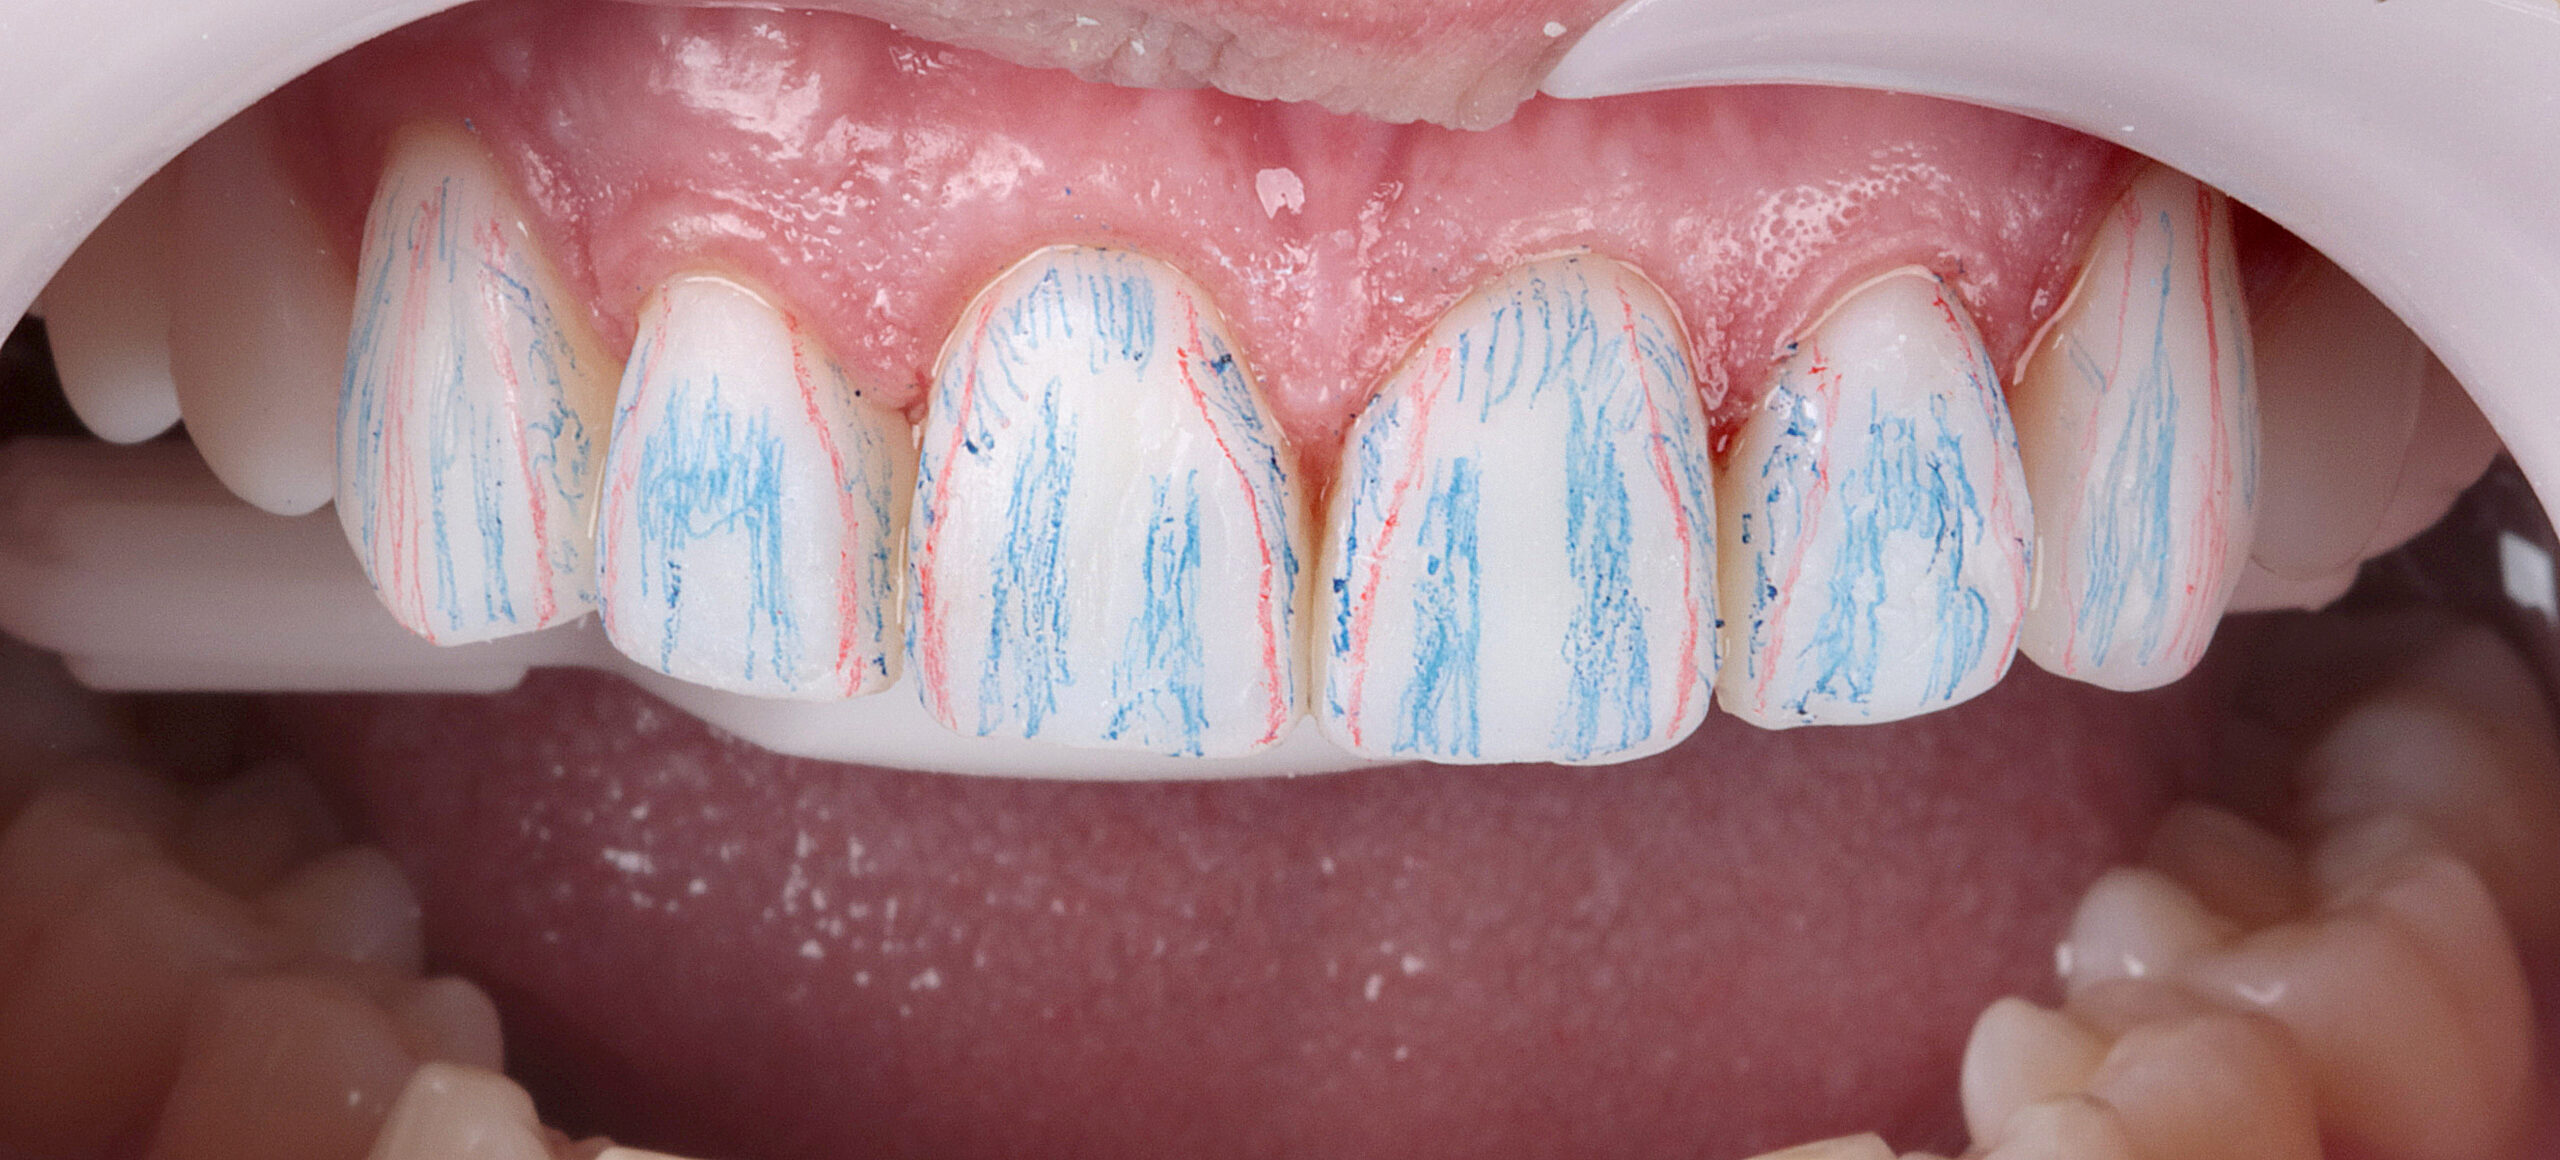
16 | Demarcation of areas of brightness and shadow of the teeth.
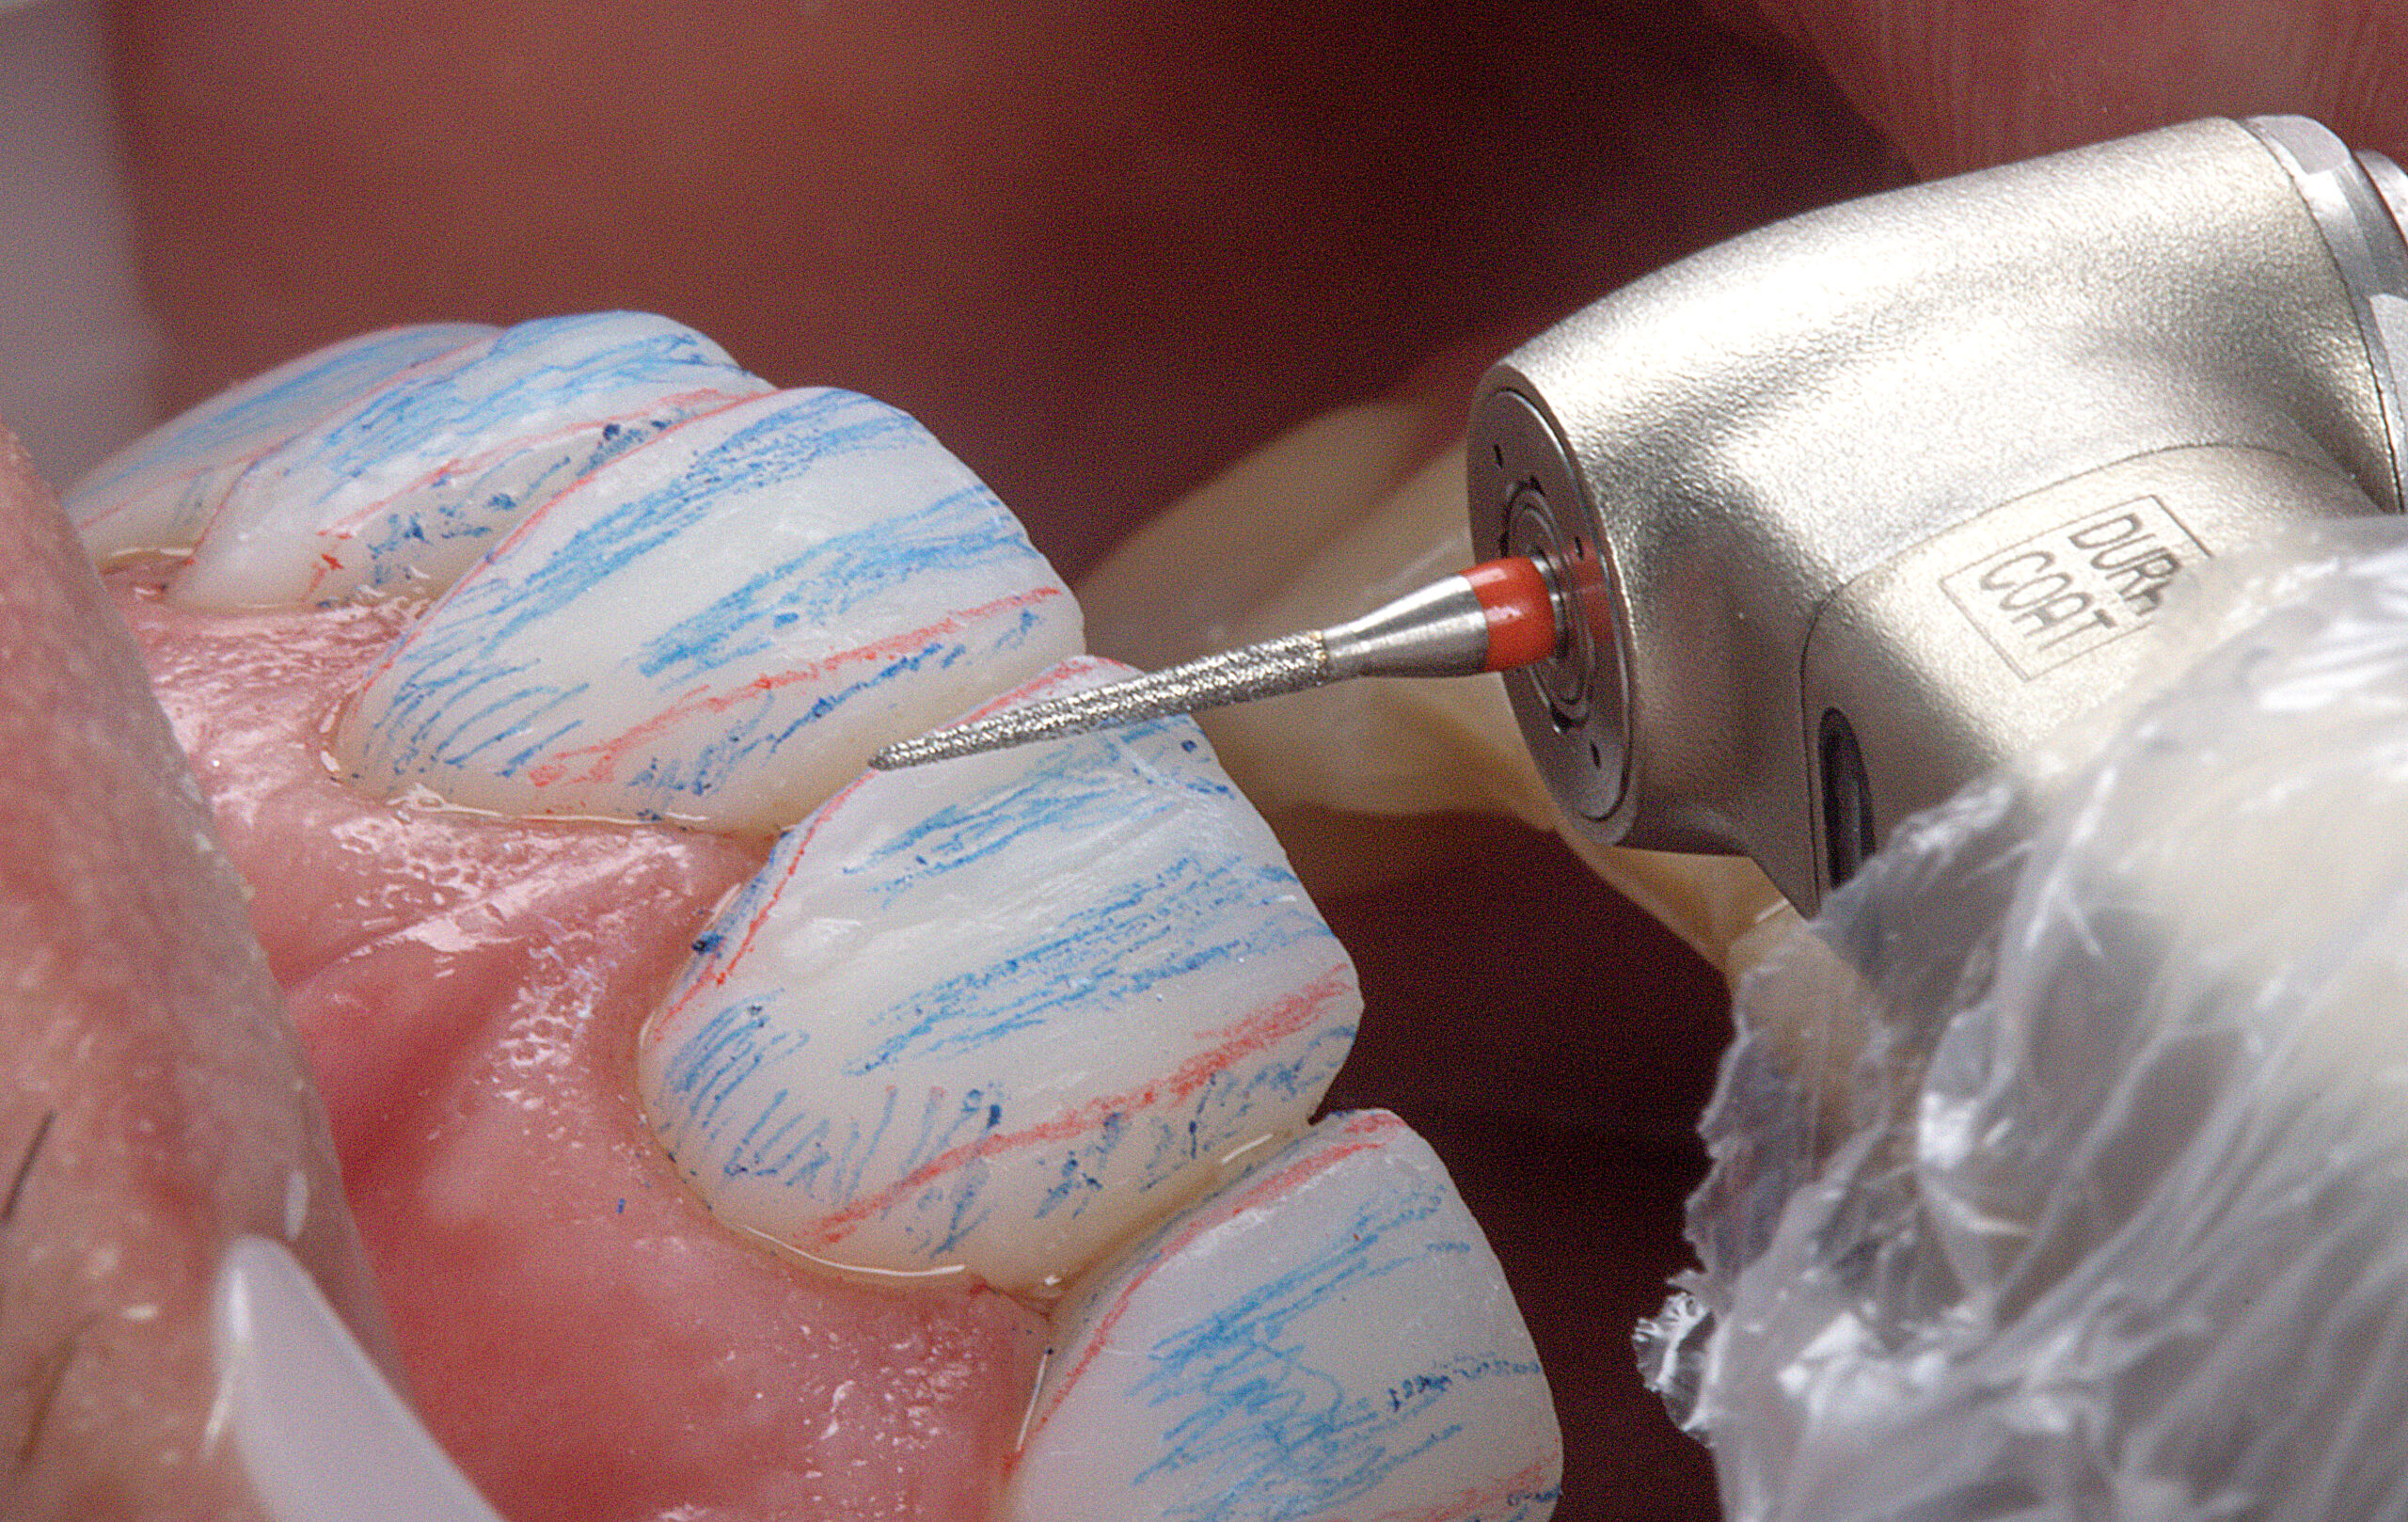
17 | Start of finishing with 2200F diamond tip
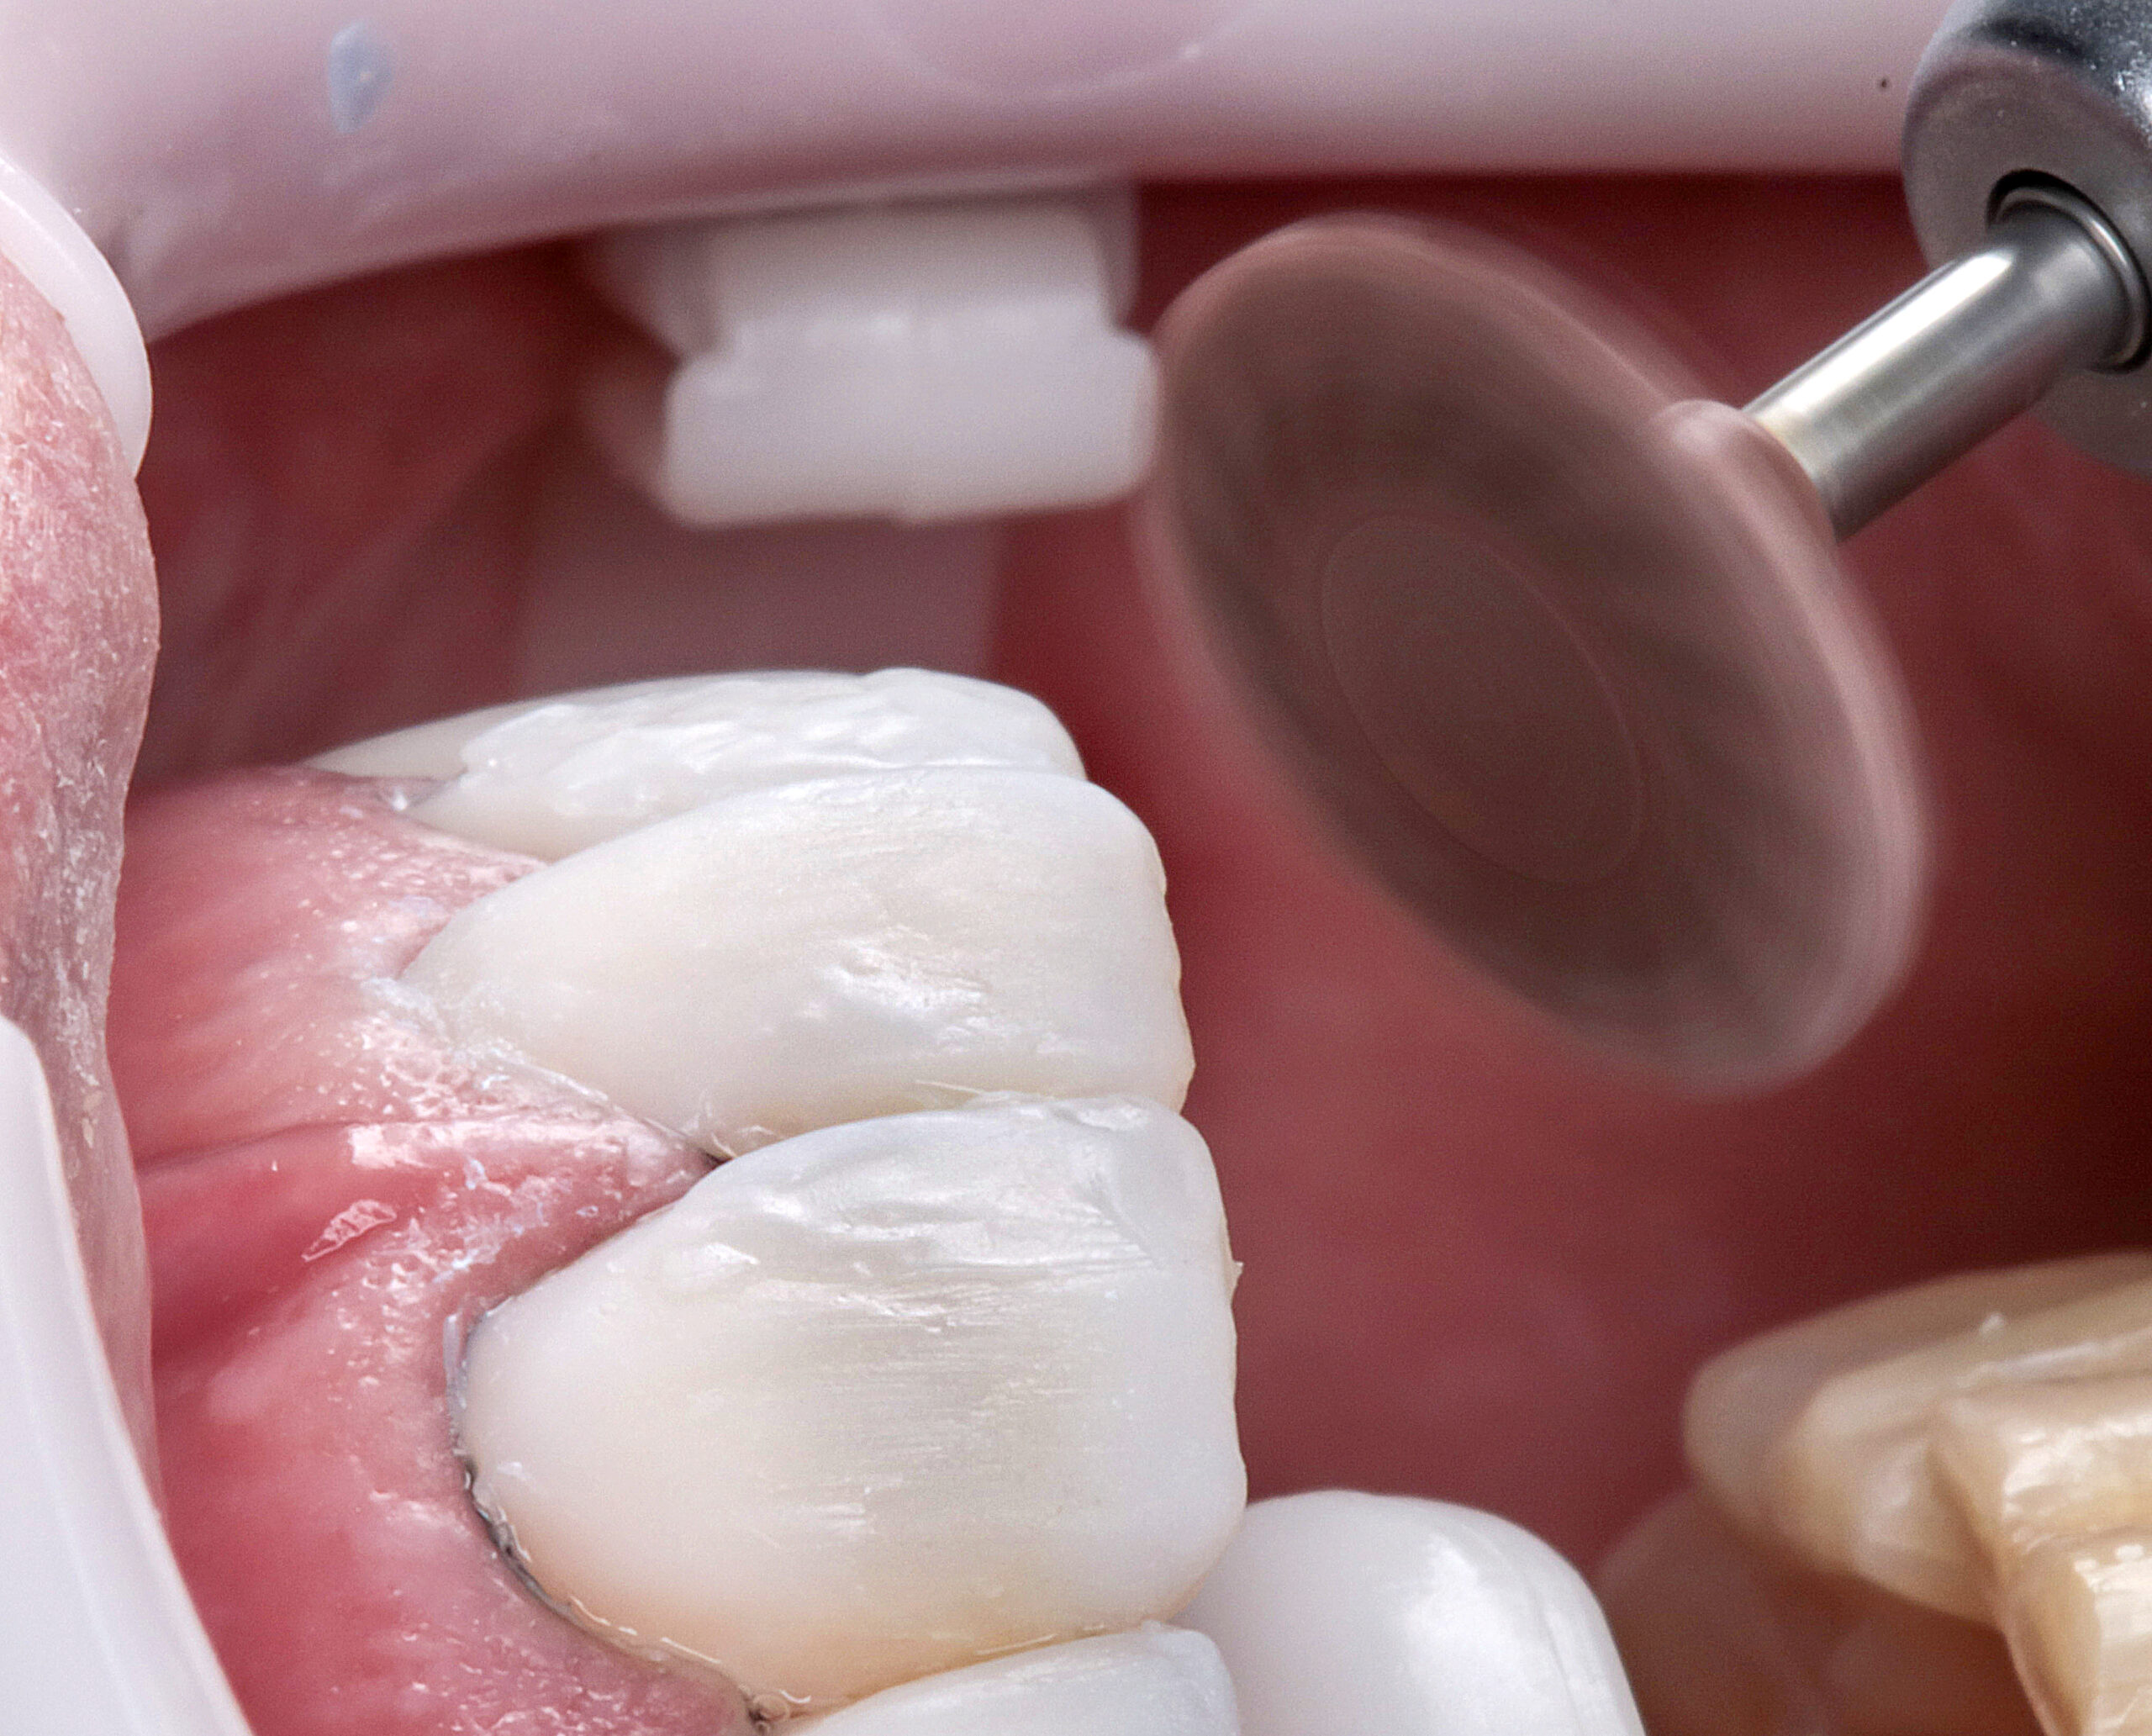
18 | Phase 1 polishing
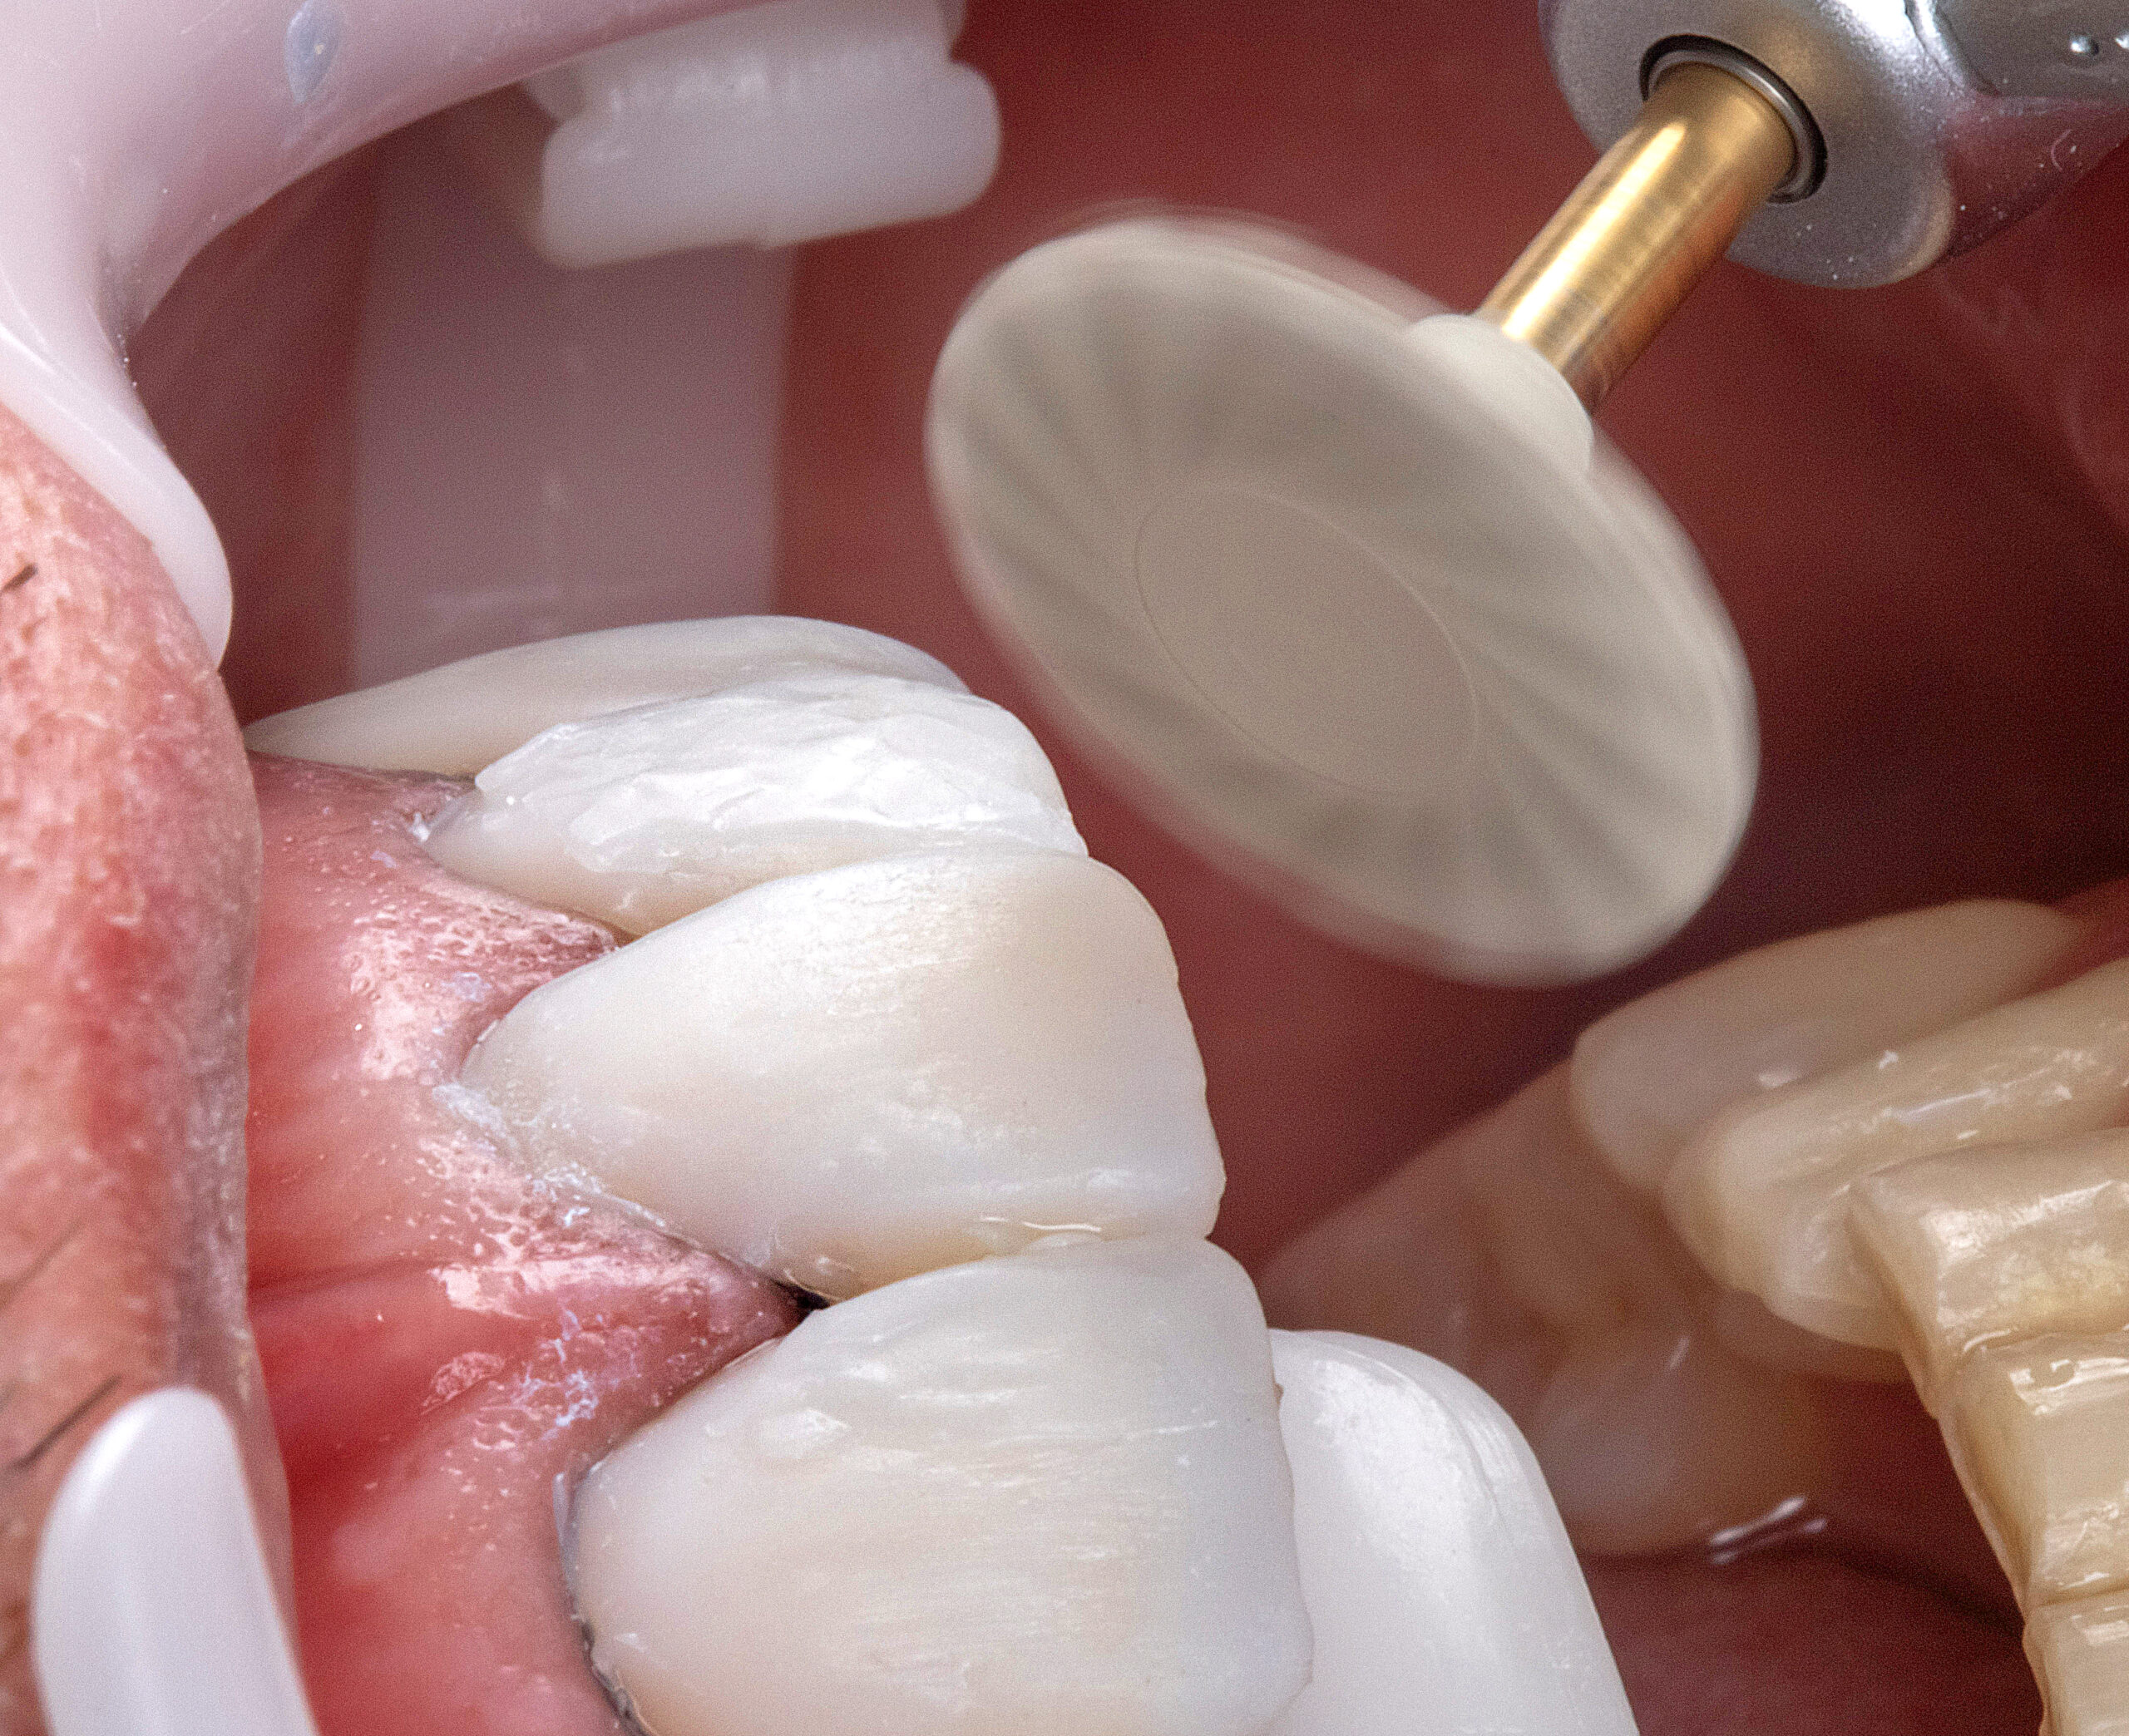
19 | Polishing phase 2.
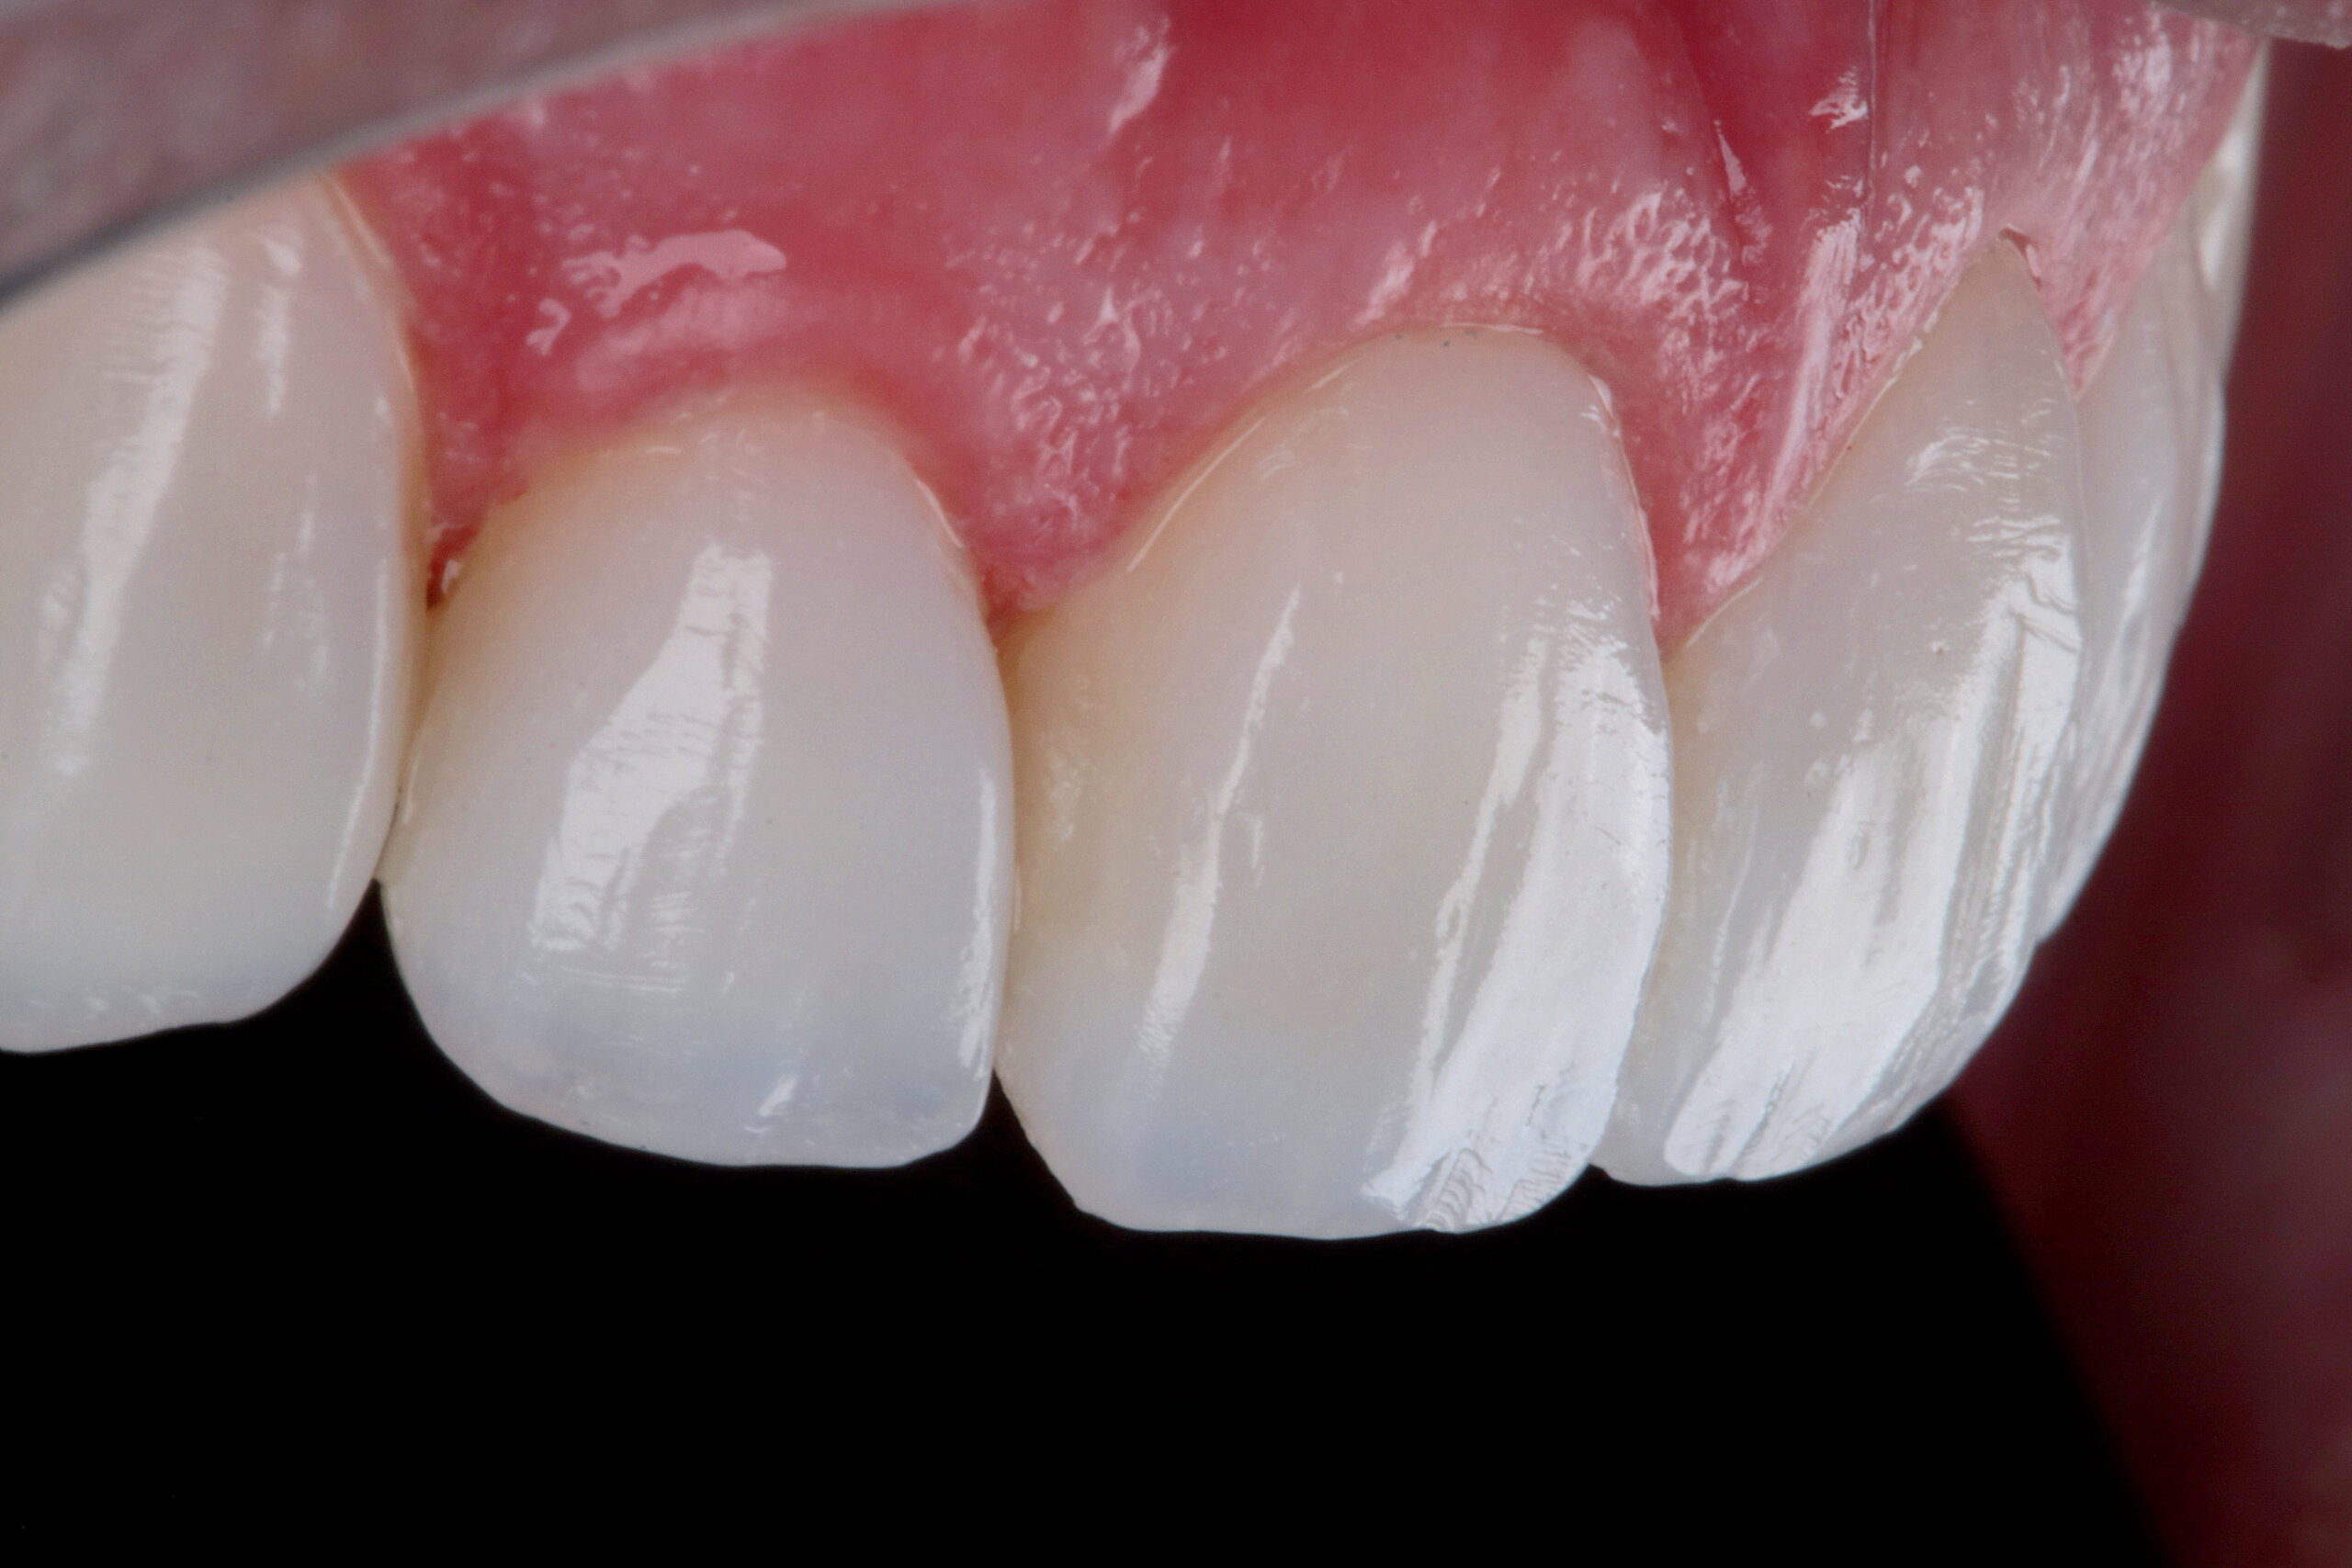
20 | After the first phase of finishing and polishing.
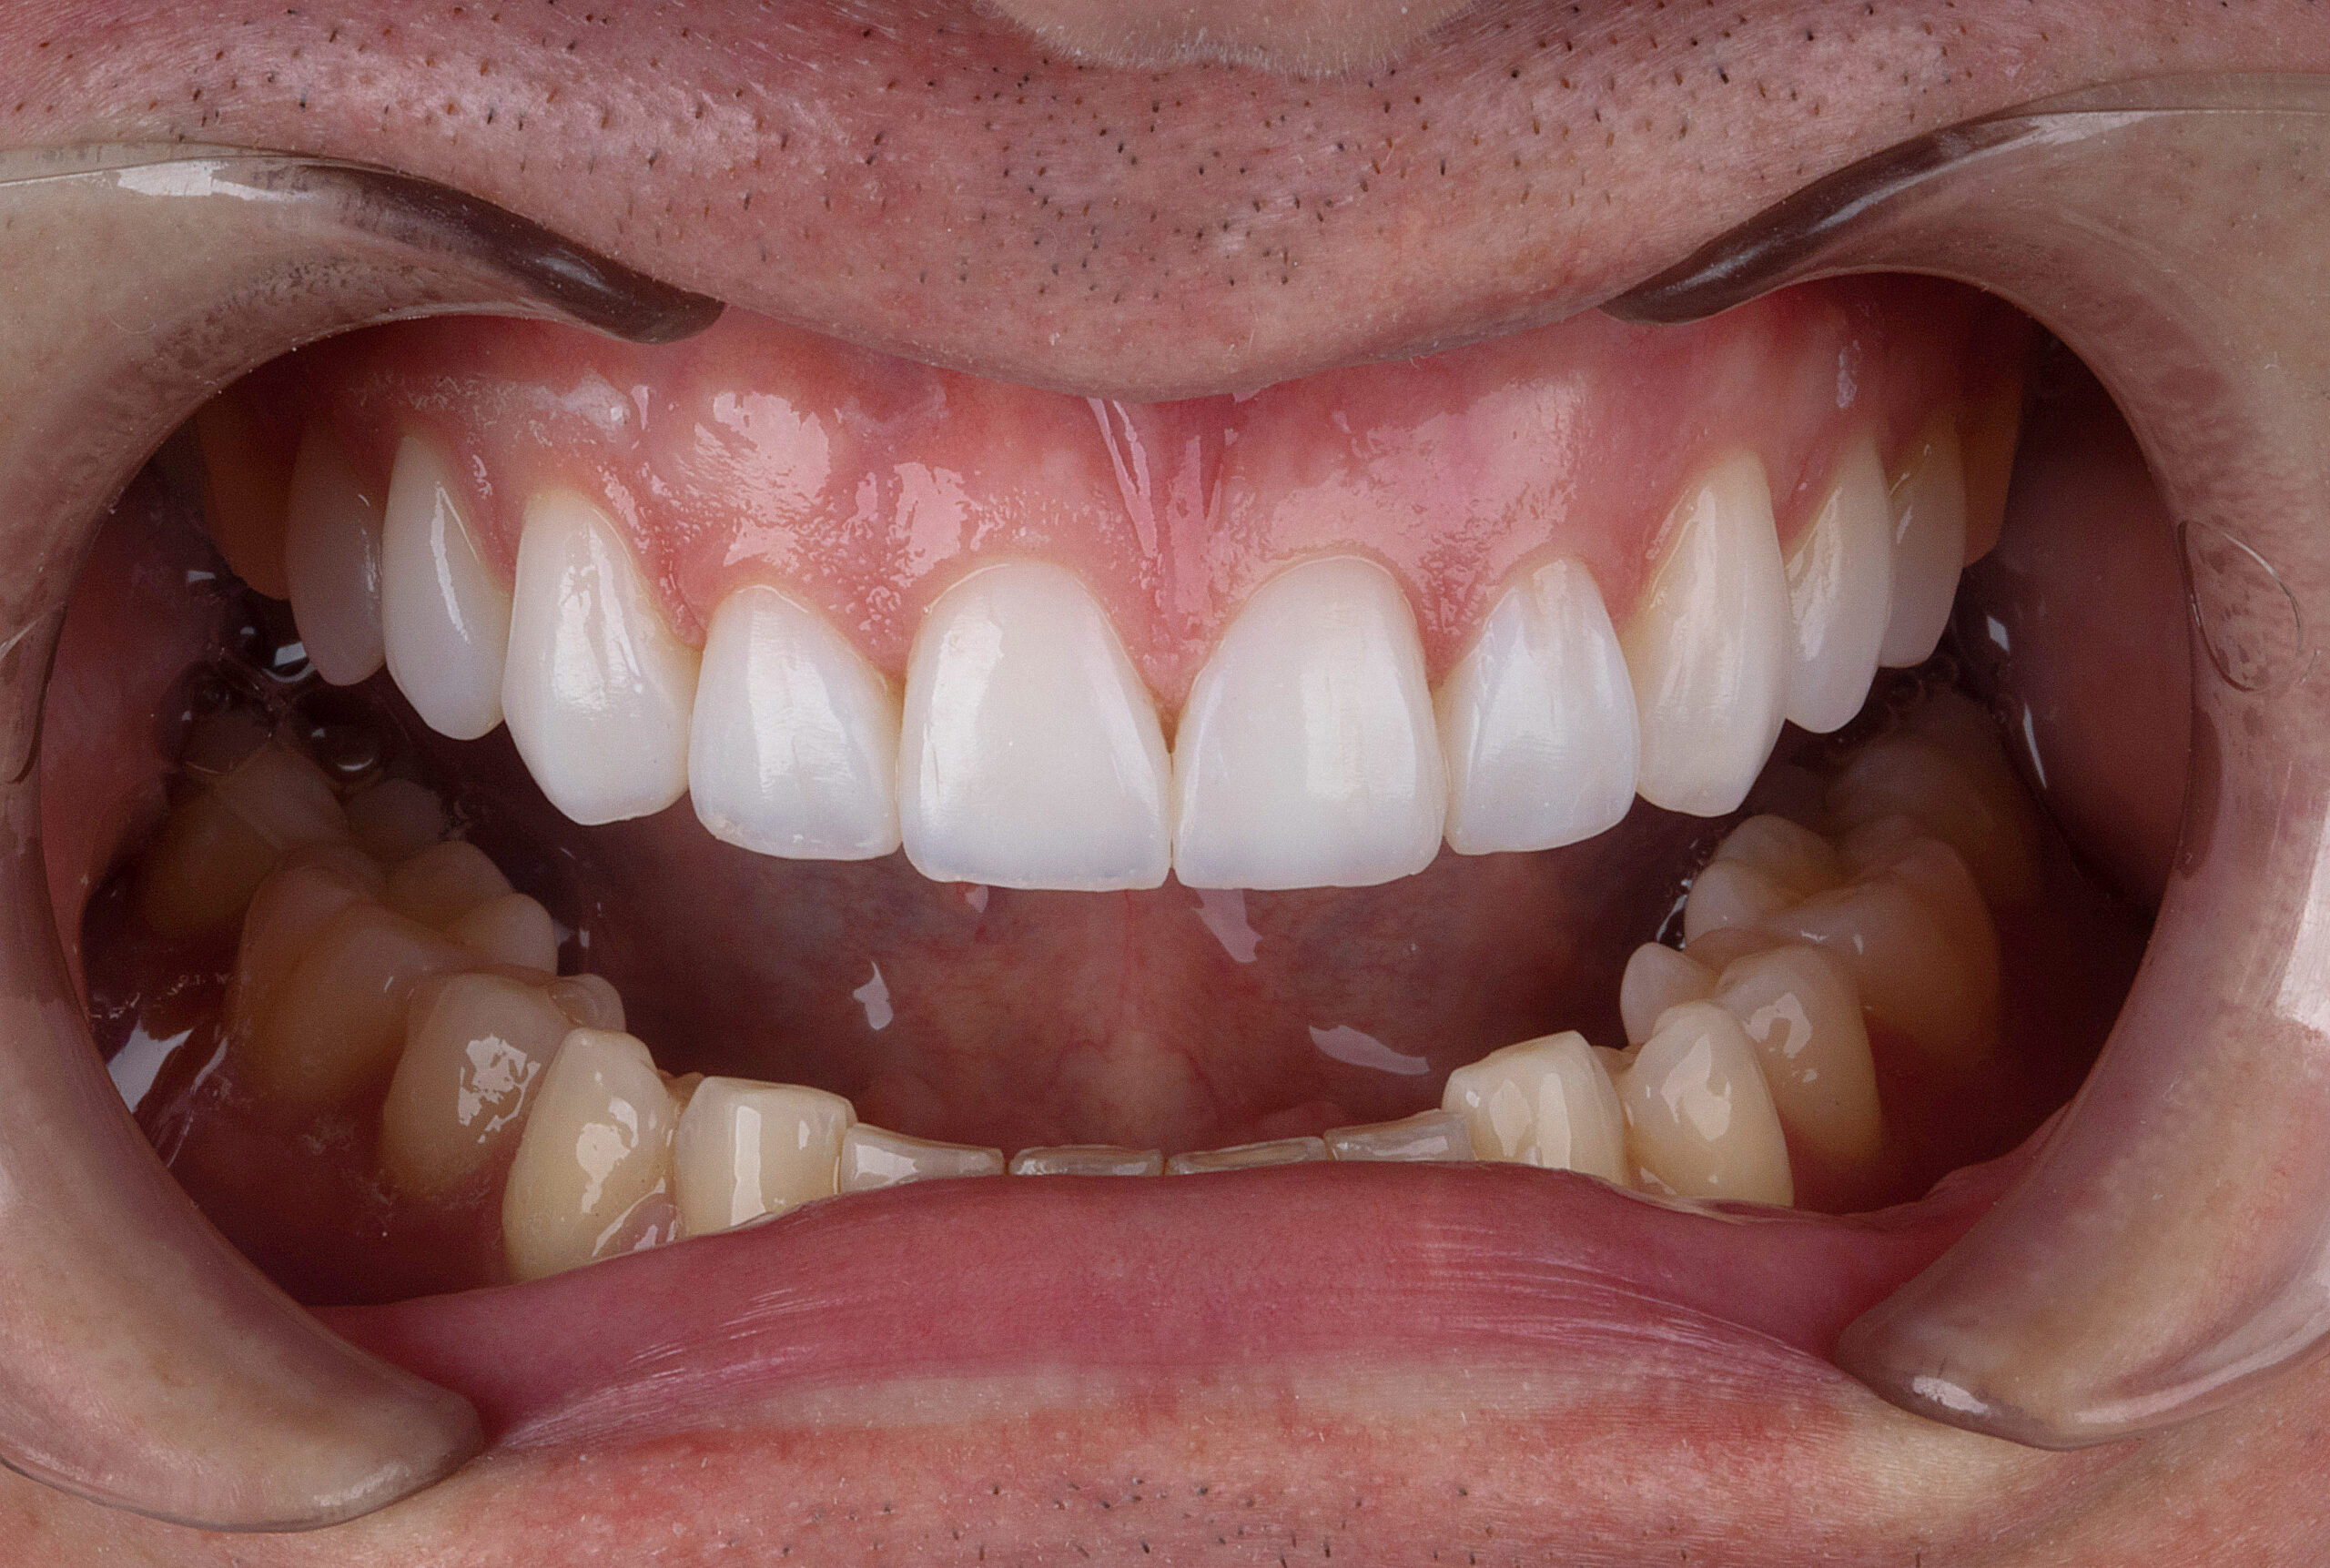
21 | Immediate final of superior arch.
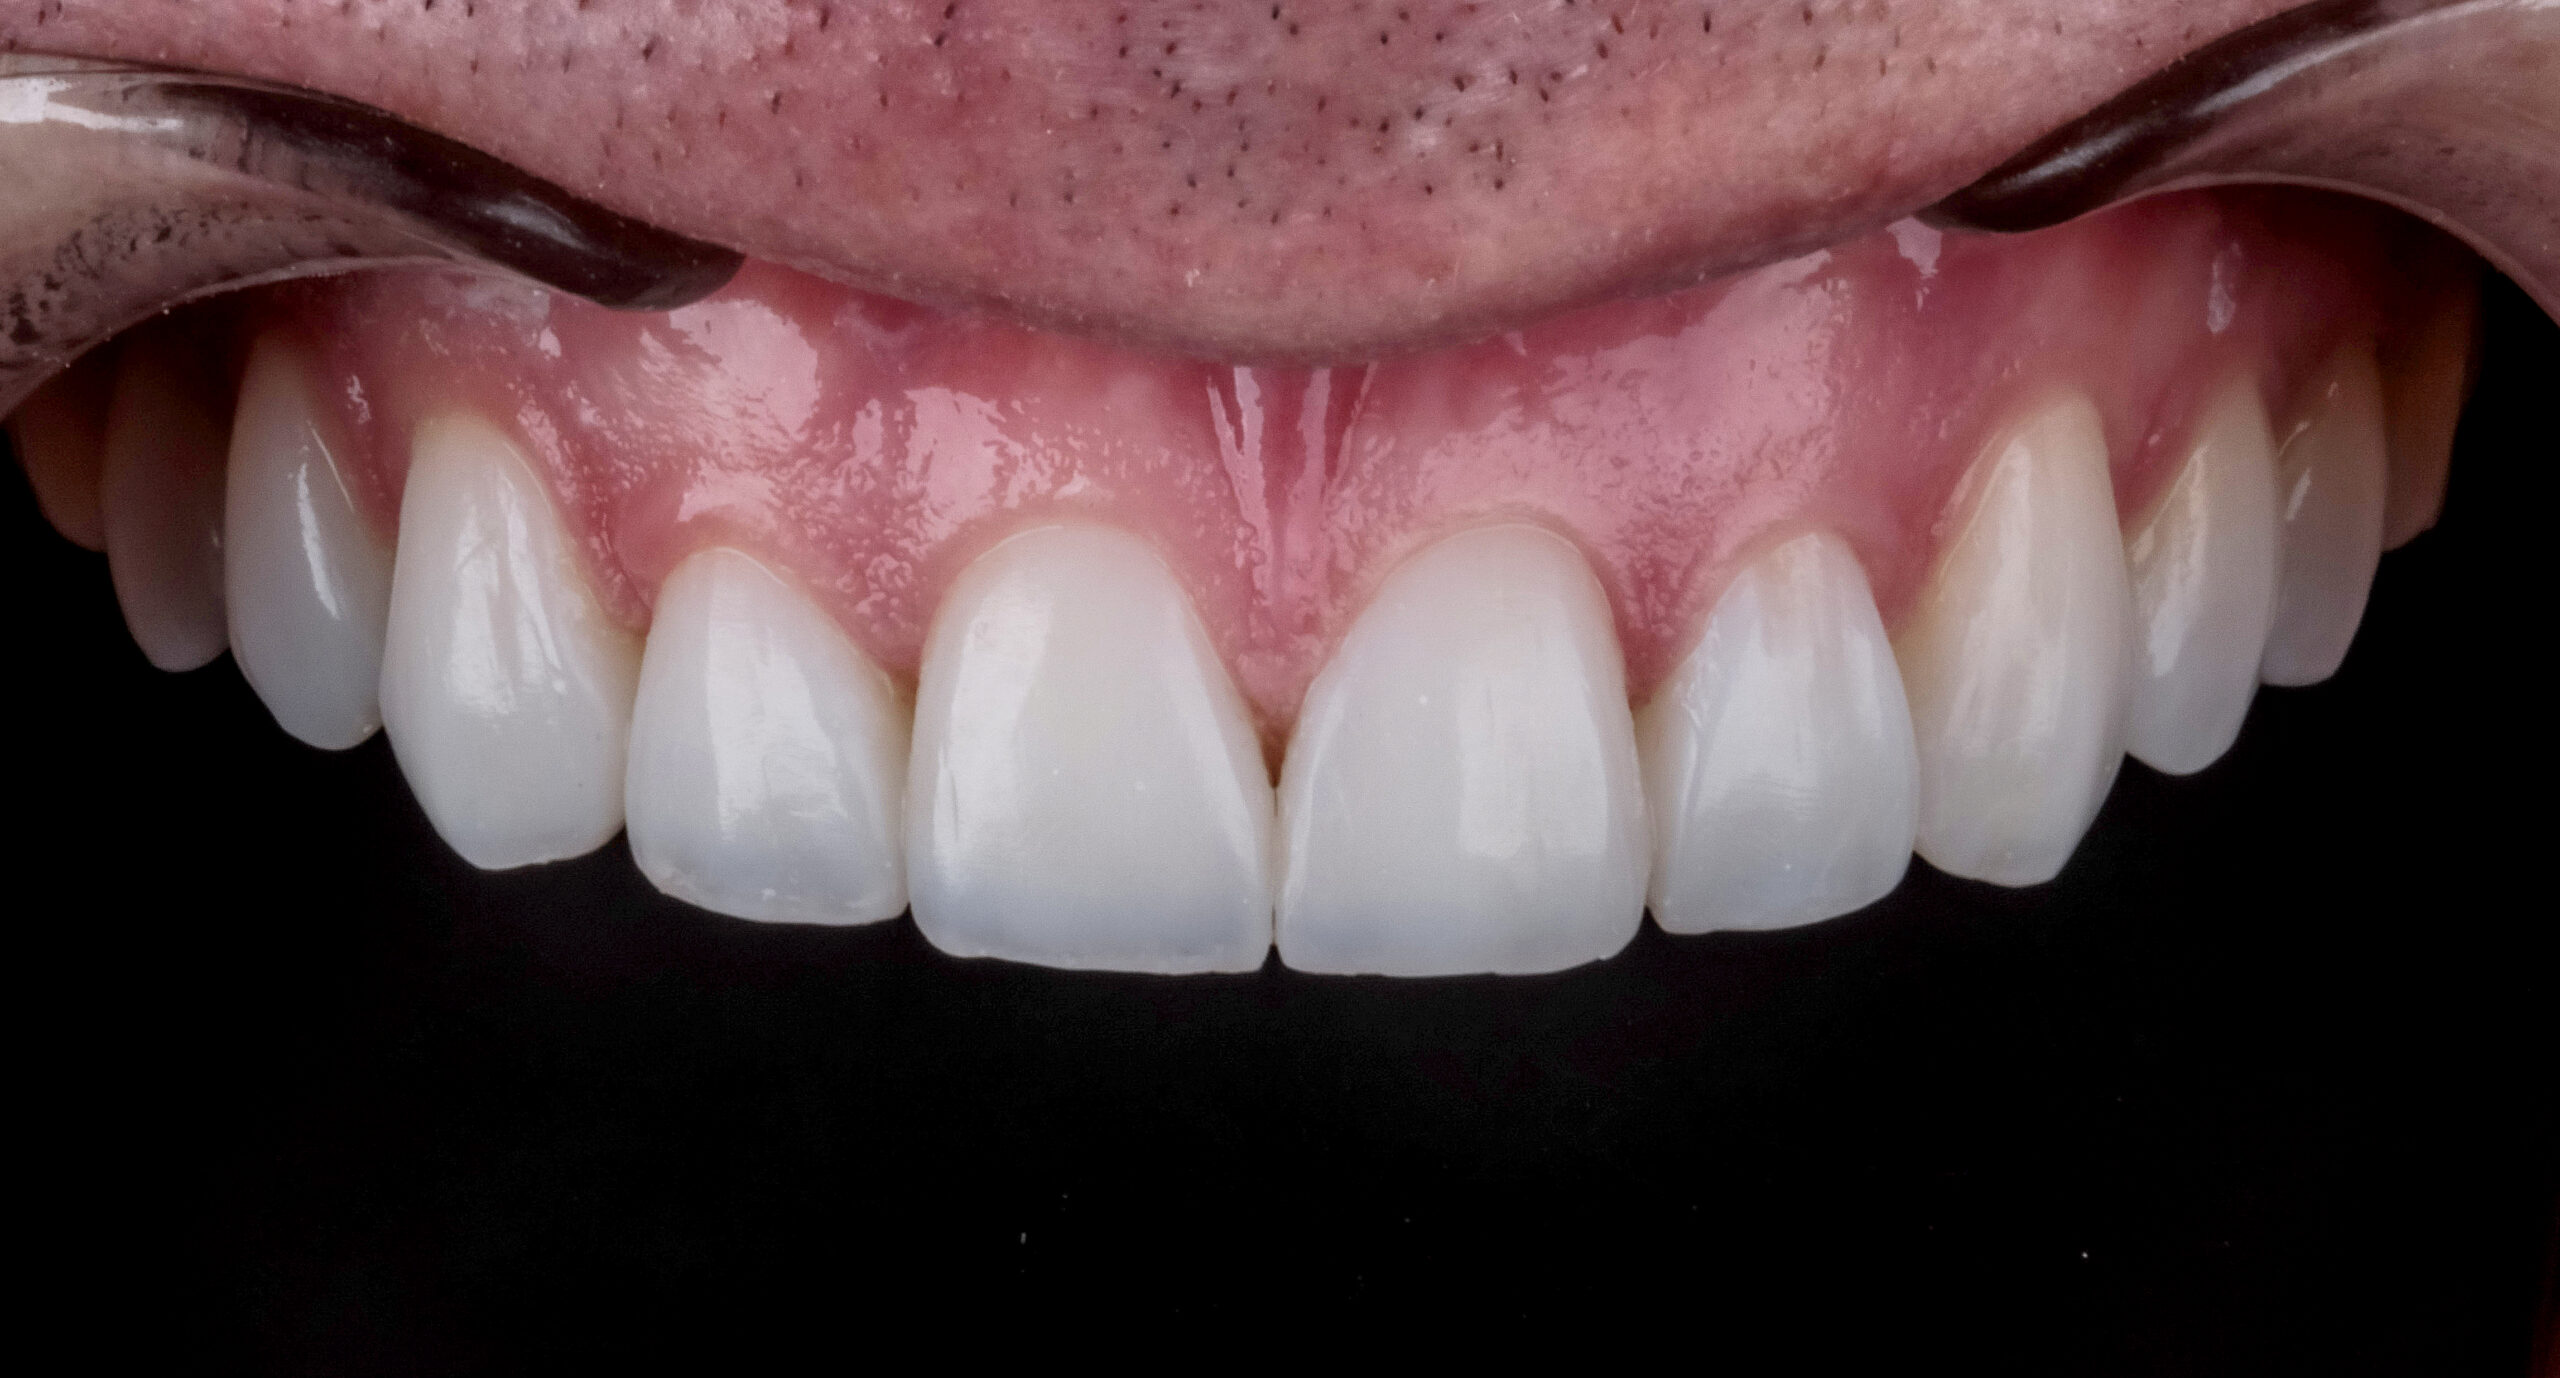
22 | Intraoral final.
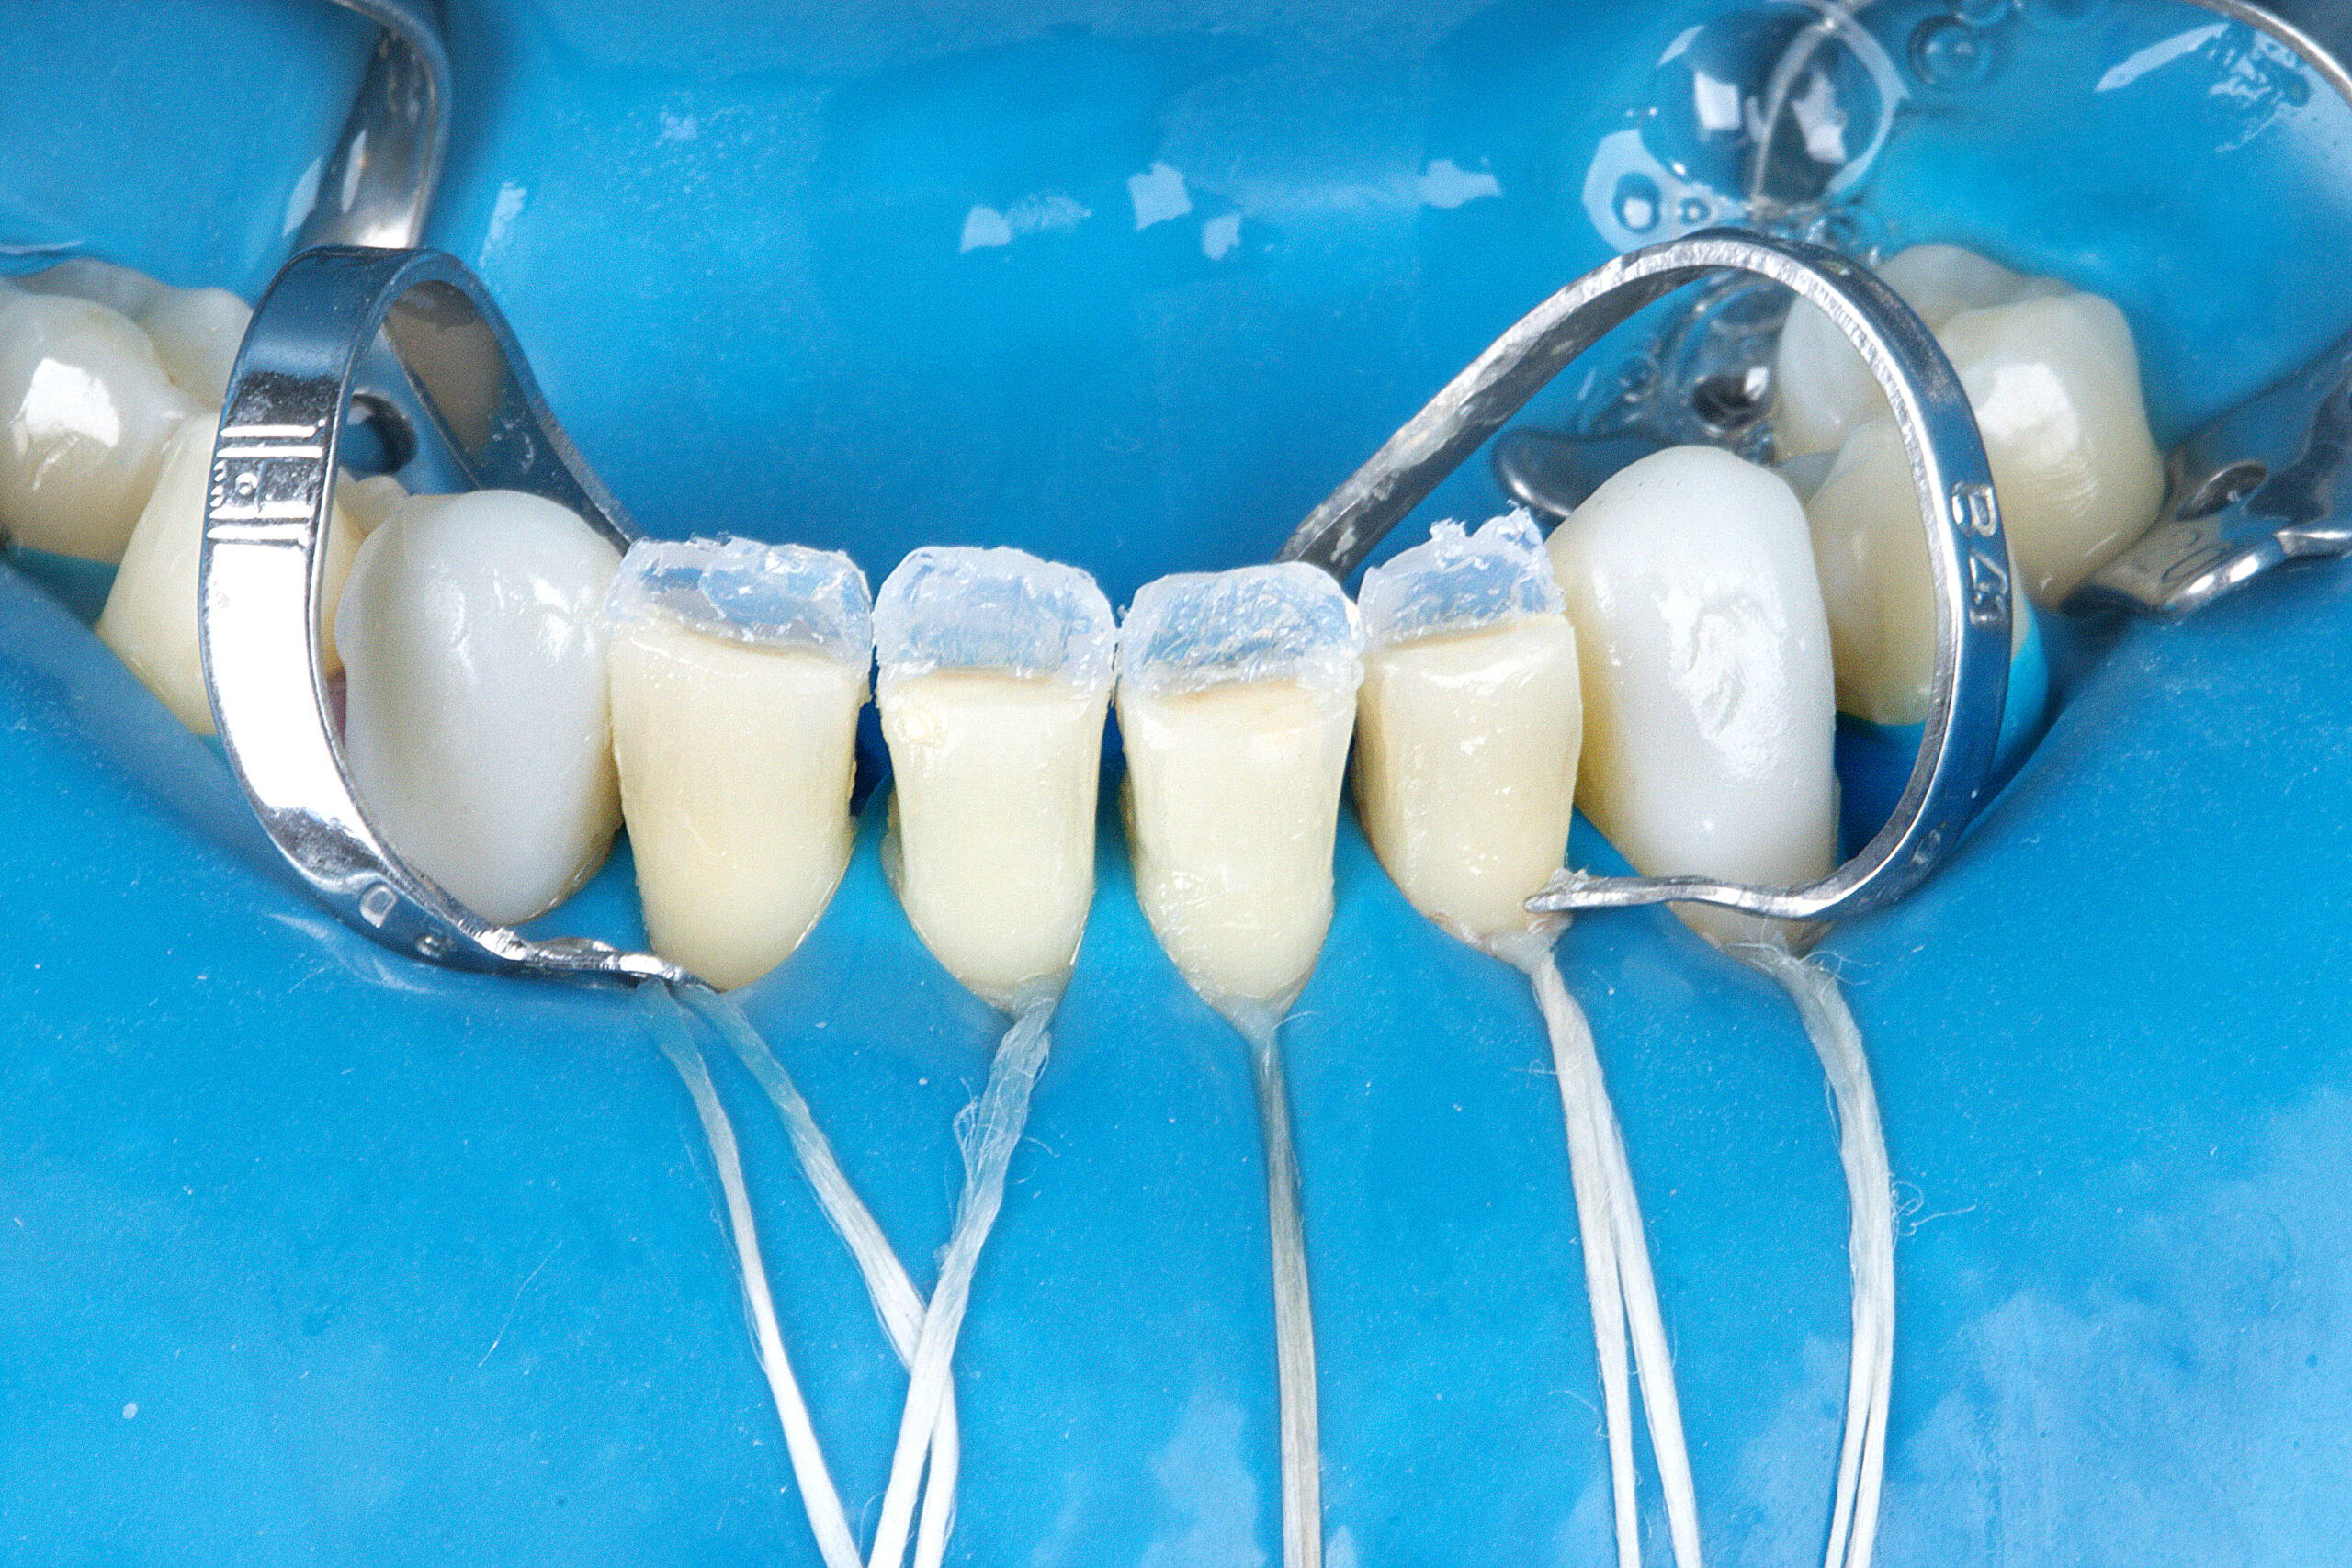
23 | Beginning construction of inferior teeth.
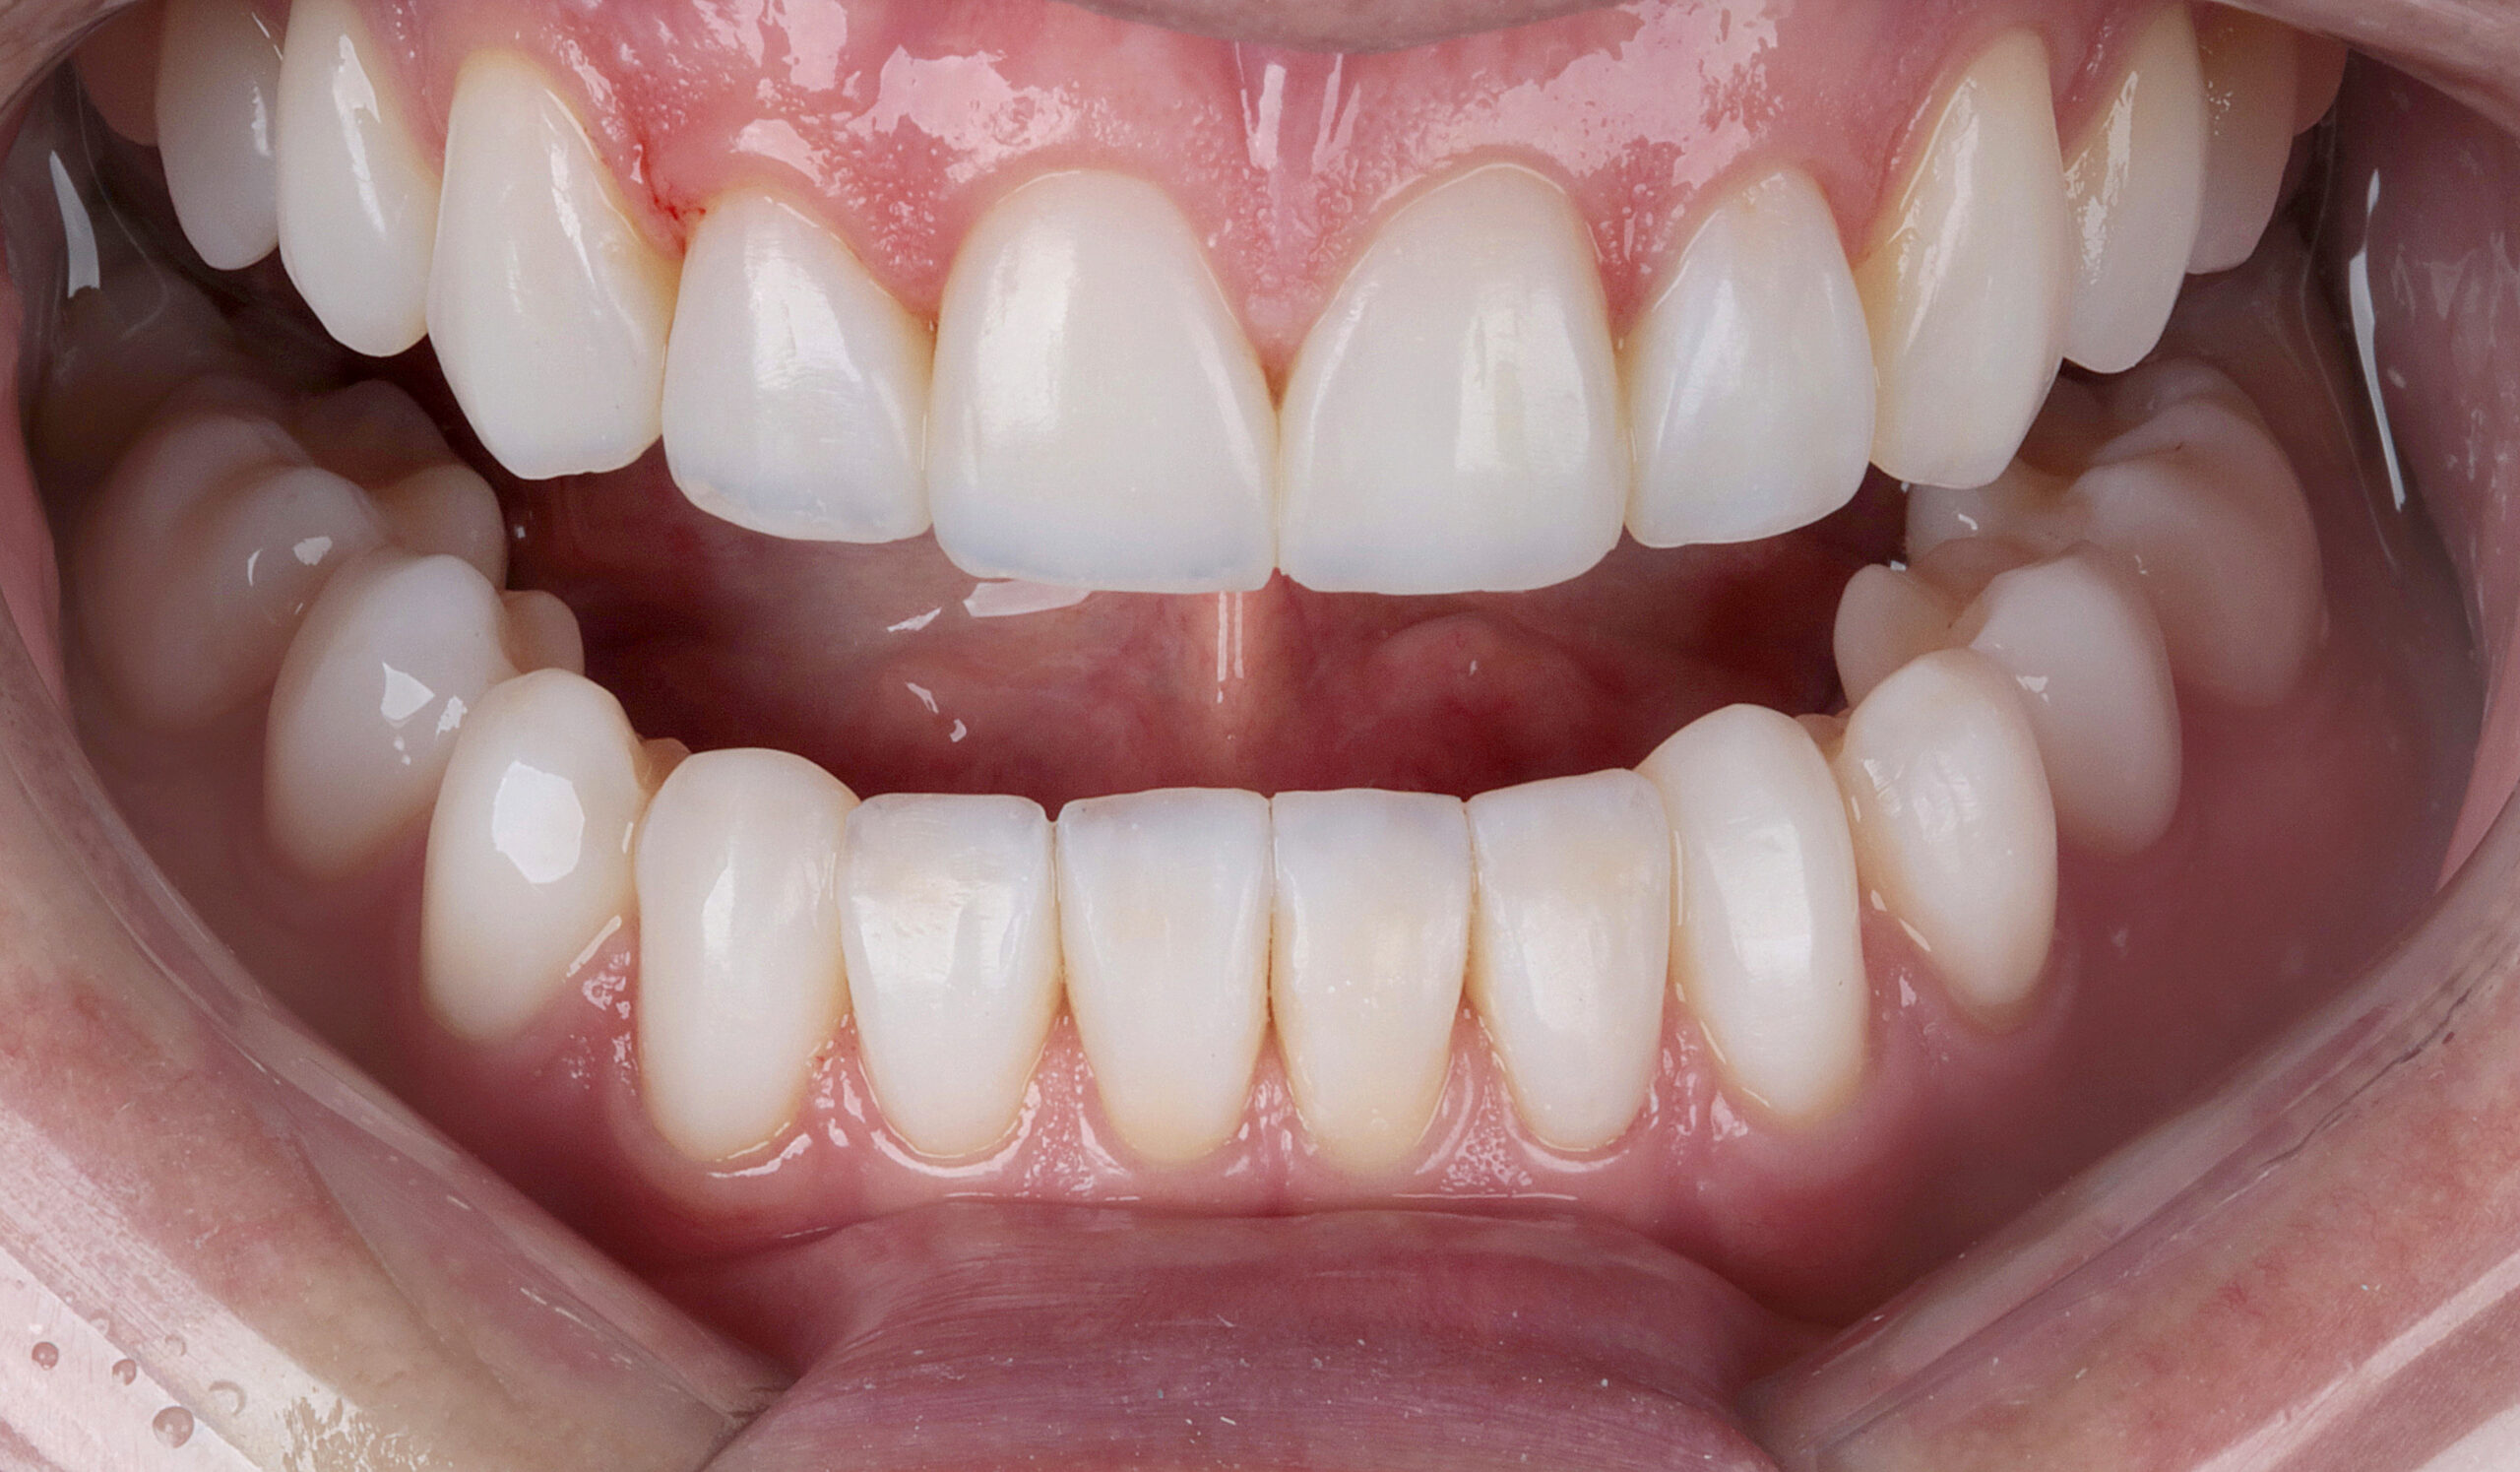
24 | Photo of the final smile.
Click here to check a step by step to the Vittra APS magic!


