The secret of dental whitening is to use the technique associated with Whiteness HP Automixx 35% PLUS and Whiteness Perfect.
Authors: Prof. Dr. Fabiano Carlos Marson and Prof. Dr. Amanda Vessoni Barbosa Kasuya.
FEMALE PATIENT, 19 YEARS OLD
Dissatisfied with the shade of her teeth.
Initial evaluation
No relevant clinical finding was found after anamnesis, clinical, and radiographic examination; the patient had zero caries. Treatment was started with professional prophylaxis, and after three days, the patient returned for tooth whitening. The whitening treatment was performed in two stages: one in-office and the other following the take-home whitening technique
Treatment performed
The initial color recording was performed using the Vita shade guide, canines in colors A3 and A1 in the incisors, followed by applying the desensitizer Desensibilize KF 2% for 10 minutes before the in-office whitening technique.
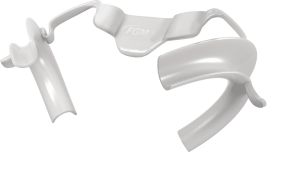
For correct protection of oral tissues, the Arcflex lip and tongue retractor was used, and due to the high concentration of the gel, it was also necessary to protect the gingival tissues through the application of the Top Dam gingival barrier and light-curing for 20 seconds.
The patient underwent a whitening session with Whiteness HP AutoMixx 35% PLUS, with an application of the whitening gel for 40 minutes. The gel insertion over the tooth is through the mixing tip, which facilitates the application, avoiding handling erros.
From this, continuing the proposed treatment, the patient used the take-home whitening technique with Whiteness Perfect 16% for three to four hours a day for two weeks.
The trays have been tested for their adaptation, retention, and comfort. Soon after the tray test, the patient was instructed to apply one drop of the whitening gel to the region corresponding to the vestibular face of the teeth to be whitened. After the treatment time, the patient returned to the final color record.
Step by step dental whitening

1 | Initial shade taking with the color guide, canines in color A3 and A1 in the incisors.

2 | Preparation for Desensibilize KF 2% application.

3 | Desensitization protocol with Desensibilize KF 2% for 10 minutes.

4 | Application of the Top Dam gingival barrier.

5 | Aspect with the whitening gel applied.

6 | Tray adaptation test by the patient.

7 | Demonstration on how to apply the correct amount of whitening gel to the tray.

8 | Record of the final color after treatment.

9 | Final aspect.
Whiteness Perfect: 5x awarded as the best take-home whitening gel!


